
| Version 26 (modified by , 14 years ago) ( diff ) |
|---|
How to install Magnolia
1. Install Eclipse for Magnolia
Note the Eclipse version.
Make the directory Magnolia. This is recommended, but not necessary.
Download Eclipse from http://www.eclipse.org/downloads Choose Eclipse RCP/Plug-in Developers 3.5 32-bit Java with 32-bit Eclipse (These choices will make sense when you see the Eclipse website.) Download the package to the newly created Magnolia directory.
Go to a terminal and move to the directory Magnolia. In a terminal unpack Eclipse by writing
tar xzvf [name of downloaded package]
You may now remove the installation files.
If you have 64-bit Linux installed on your machine, skip this next step. Otherwise (if you have 32-bit Linux) open the file eclipse.ini in the newly unpackaged directory and change
-vmargs
to
-vmargs -Xss8m
You can open the eclipse.ini file in e.g. Emacs.
If you have 64-bit Linux or a different operating system these settings will be changed later in the installation procedure.
2. Install Java for Magnolia
Download Sun Java 32-bit (choose Java SE, JDK6 and Linux platform) from http://java.sun.com/javase/downloads/widget/jdk6.jsp Download to the directory Magnolia.
The Sun Java site will offer you to log in, create accounts and similar. Skip these steps, which will be one of your options, and simply download the files.
Go to a terminal and move to the directory Magnolia. Install Sun Java by writing
sh [name of downloaded file]
This will result in the install program asking you to accept the licence. Flip through the licence by using the space bar, then accept the licence. You do not need to register.
You may now remove the installation files.
3. Making it work with 64-bit Linux
If you have 32-bit Linux or another operating system skip this step.
Make the following script to run Eclipse.
#! /bin/sh

export JAVA_HOME=$HOME/magnolia/jdk1.6.0_20/bin
export PATH=$JAVA_HOME:$PATH
export GDK_NATIVE_WINDOWS=1

exec $HOME/magnolia/eclipse/eclipse -vmargs -Xss8m -d32
Making a script means opening a file in an editor, e.g., Emacs and saving the file. A good name for the file in this instant might be run-eclipse. Save the file in the directory Magnolia. Add the above text to the file precisely as shown.
4. Adapting Eclipse to Rascal, Magnolia and adding some helpful tools
Start Eclipse. If you did not write a script in step 3, start Eclipse by writing in a terminal
eclipse
If you made a script in step 3, writing the name of the file you made in a terminal. For example like this:
run-eclipse
You may start Eclipse by clicking on the icon in your desktop or similar only if you did not write a script in step 3.
We will now install several new programs in Eclipse.
Install Subclipse (for Subversion).
Now, go to the menu "Help ---> Install new software ..."
Click on the button Add in the dialogue that pops up.
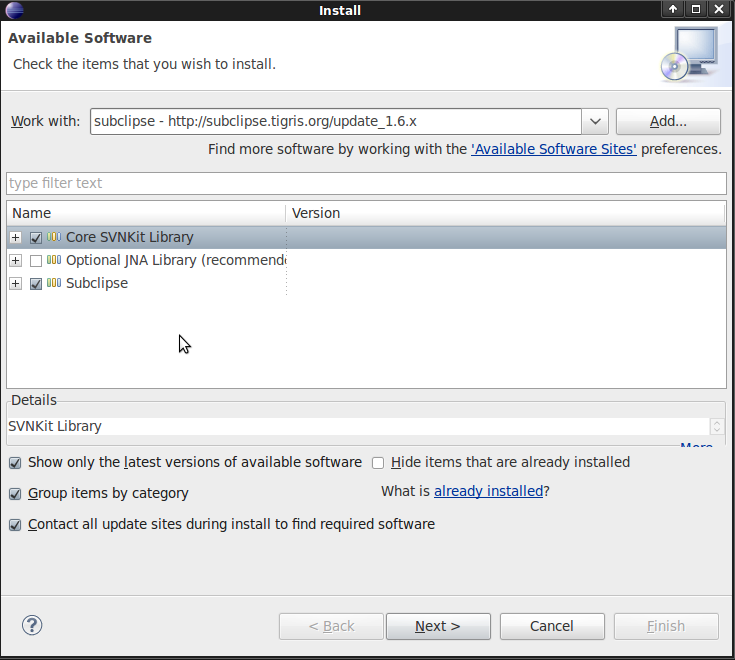
In the resulting dialogue no name is required, the url is http://subclipse.tigris.org/update_1.6.x Type in this url where is says Location and click on OK. The Add new software dialogue will look something like below. Make sure to click on the same boxes as in the picture.

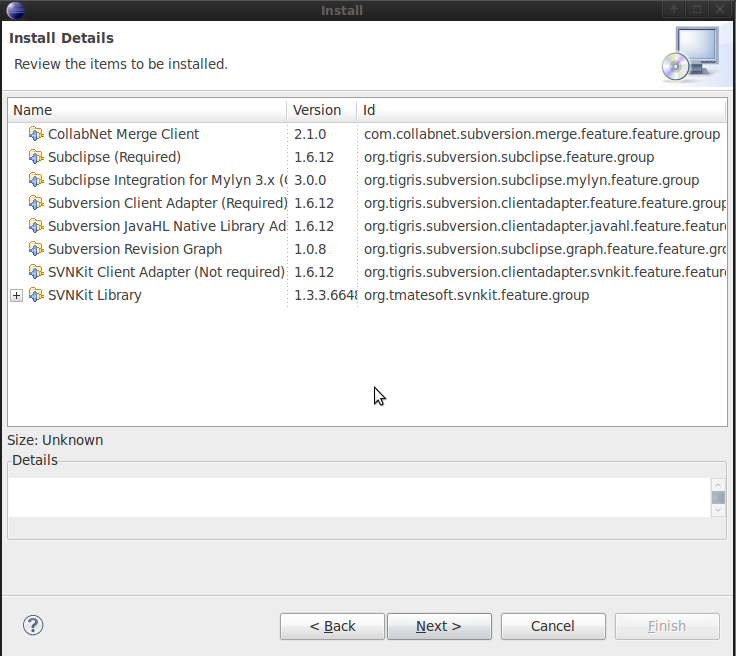
Then click on Next and will look like the picture below.

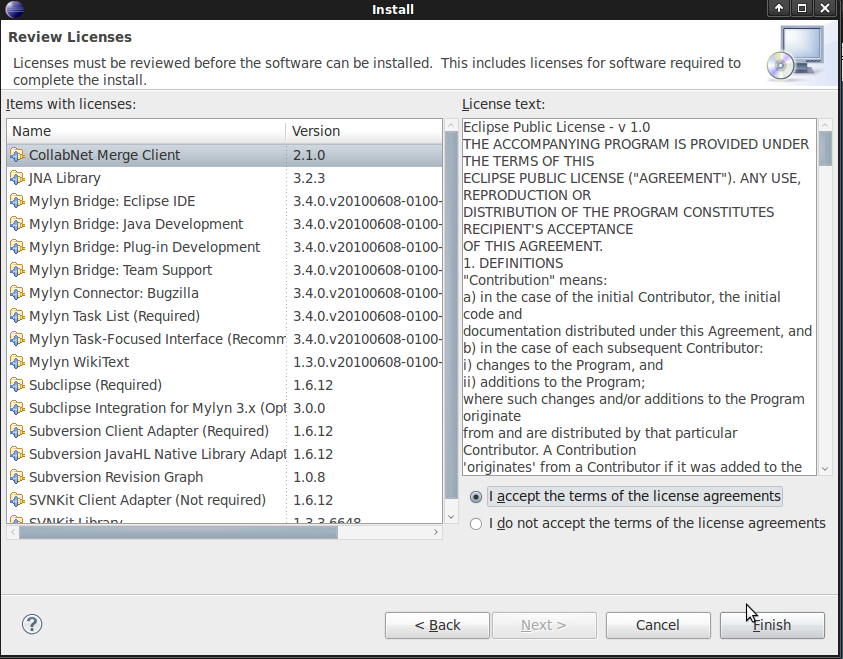
Click on Next and accept license, like below.

Then, click on Finish, and Subclipse will be installed.
Eclipse will then ask you if you wish to restart the program, but this is not necessary until all the additional software is installed.
Install Texlipse (for latex)
This software is optional for those who wish to use Latex.
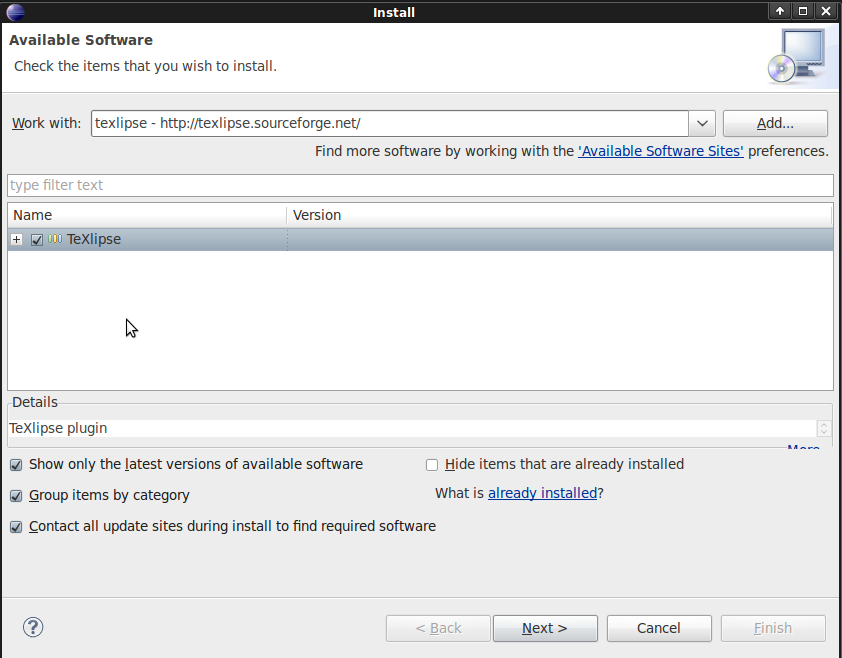
The installation precedure is the same as for Subclipse except a few things. The url typed into the Location is http://texlipse.sourseforge.net/
And you should make sure to check the same boxes as in the picture below.

Note that after clicking Next, you may have to accept certificates or licences in the main portion of the dialogue box before you click on Next or Finish.
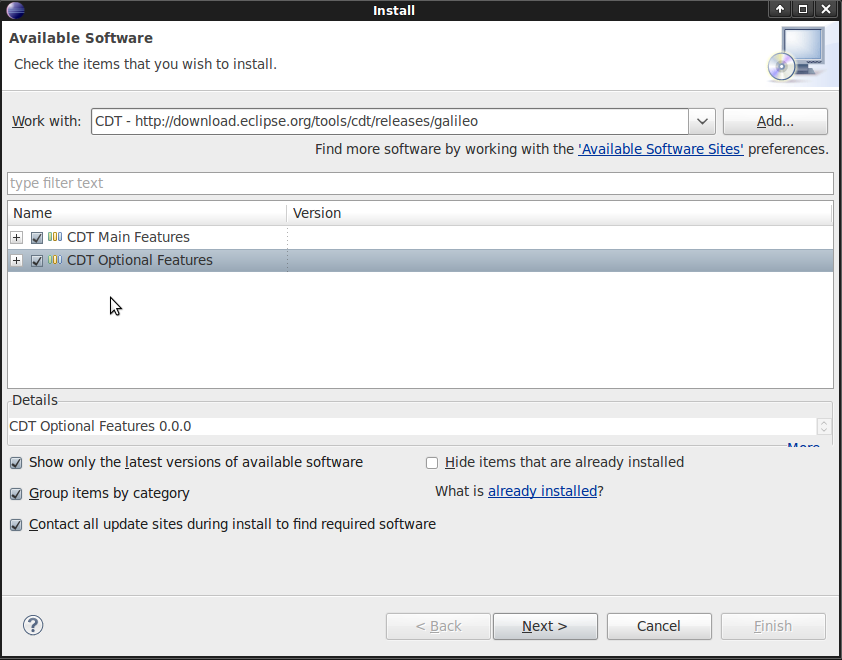
Install Eclipse C/C++ development tool - CDT
The installation precedure is the same as for Subclipse except a few things. The url typed into the Location is http://download.eclipse.org/tools/cdt/releases/galileo/
And you should make sure to check the same boxes as in the picture below.

Note that after clicking Next, you may have to accept certificates or licences in the main portion of the dialogue box before you click on Next or Finish.
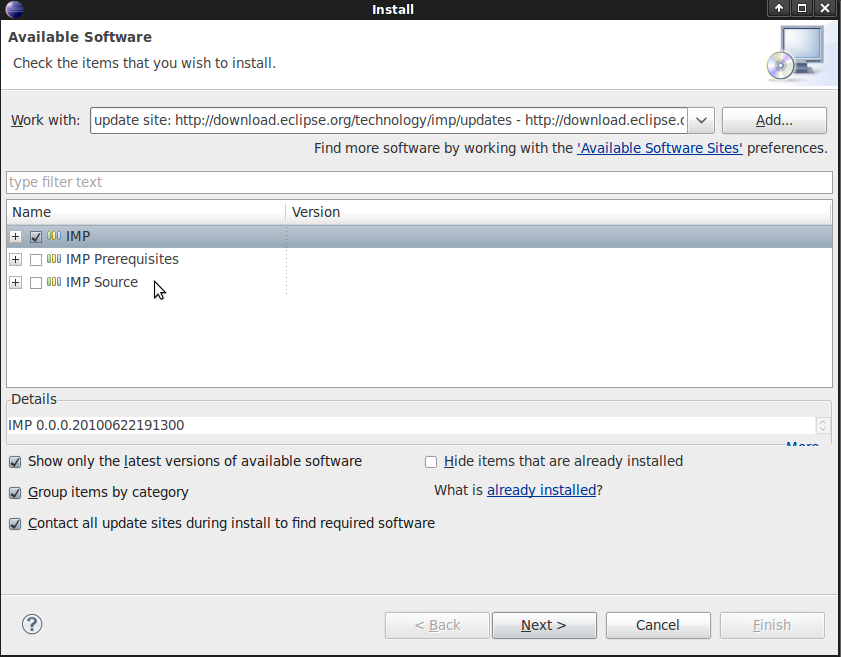
Install Imp
The installation precedure is the same as for Subclipse except a few things. The url typed into the Location is http://download.eclipse.org/technology/imp/updates/
And you should make sure to check the same boxes as in the picture below.

Note that after clicking Next, you may have to accept certificates or licences in the main portion of the dialogue box before you click on Next or Finish.
This time when Eclipse asks if you wish to restart the program say Yes.
5. Install Rascal and Magnolia
Attachments (7)
- svn.png (62.4 KB ) - added by 14 years ago.
- svn2.png (65.2 KB ) - added by 14 years ago.
- svn3.png (140.6 KB ) - added by 14 years ago.
- tex.png (55.1 KB ) - added by 14 years ago.
- cplusplus.png (61.2 KB ) - added by 14 years ago.
- imp.png (59.7 KB ) - added by 14 years ago.
- sophus.png (104.6 KB ) - added by 14 years ago.
Download all attachments as: .zip