
How to install Magnolia
The Magnolia compiler is embedded in the Magnolia IDE, a collection of plugins for Eclipse. Eclipse runs on the Java virtual machine. The Magnolia compiler outputs C++ code by weaving together C++ backend code from the Magnolia library with compiled Magnolia source code. The Magnolia library is stored in an open subversion repository. The C++ code is compiled to executables using a C++ compiler under control of a make script. Thus all of these components need to be present for the Magnolia system to work.
Note: The Magnolia plugin is demanding and may easily be in conflict with other Eclipse plugins. You should therefore keep the Magnolia IDE separate from other Eclipse installations on your machine.
1. Prepare your computer
Install Java JDK 8
Only Java 8 will work for Magnolia so make certain you have this, possibly in addition to any other Java version you may be using.
- You need the full JDK (Java Development Kit), not just a JRE (Java Runtime Environment).
- Make certain you choose a JDK 8 from summer 2017 or later due to certificate issues with some of the Eclipse plugins.
- There are several choices for free downloads of JDK 8 (the first two of these appear to be obsolete):
- OpenJDK an open source JDK, works nicely if available for your platform (provided for most Linux distributions);
- Oracle's OpenJDK production-ready open-source builds of the JDK from Oracle (limited range of platforms);
- Oracle Java SE JDK commercial JDK builds from Oracle (requires creating an account), free downloads for most platforms;
As your system probably will have a more recent Java installed,
you will need to tell Eclipse to use the Java 8 virtual machine by adding the path to the -vm option in the eclipse.ini file (see below).
Install C++ 2011 (or more recent) compiler
The Magnolia plugin contains a compiler from Magnolia to C++ 2011. These programs must be compiled with a 2011 (or newer) enabled C++ compiler, e.g., gnu g++ 4.8 or preferably newer, or clang++. Most systems come with a relatively up to date C++ compiler and make facility, otherwise you need to install one yourself.
- On MacOSX terminal windows and compilers are part of the Xcode tool suite, available for free in the App Store (see menu, on the upper left).
- On Windows it may now be possible to use Magnolia with the native developer tools. Otherwise we recommend installing the Cygwin free, open-source gnu g++ and make utility. When using the downloader, be certain to activate the developer section and select the gcc-g++:GNU Compiler Collection and make: The GNU Version of the ‘make’ utility.
2. Install Eclipse for Magnolia
Create the directory magnolia (or whatever name you prefer) for storing Eclipse and your Magnolia workspace. This is recommended, but not necessary.
There are several alternatives for downloading Eclipse. We recommend downloading an Eclipse package (do not use the Eclipse installer):
- Eclipse Oxygen Package recommended release.
Choose Eclipse IDE for C/C++ Developers.
Depending on your operating system you may now have an eclipse-cpp-oxygen-*.zip, an eclipse-cpp-oxygen-*.dmg, or an eclipse-cpp-oxygen-*.tar.gz file.
Unpack it, and install the software in the directory magnolia as planned.
If you downloaded a tar file on Linux/BSD/Unix/MacOSX go to a terminal and move to the directory magnolia. In the terminal unpack Eclipse by writing tar xzfp [name of downloaded package].
After installation you may optionally remove the installation files.
Edit the file eclipse.ini
NB! On current MacOS you need to start Eclipse (and immediately quit it) before editing the "eclipse.ini" file. Use something like open -a Eclipse*.app --args -vm jdk8path (where jdk8path is the path to the JDK 8 tools, see below).
The file eclipse.ini is a normal text file which is somewhere in the newly unpackaged directory.
At the top insert the lines
-vm
<the path to your JDK 8>
The path to JDK 8 jdk8path may be something like C:\Program Files\Java\jdk1.8.0_144\bin on Windows, /System/Library/Frameworks/JavaVM.framework/Versions/A/Commands on MacOS, or /opt/java-jdk-1.8.0.102/bin on Linux.
Then increase the heap size to 8g (or as much as you can afford given your machine's memory) by modifying the -Xmx1024m line in the eclipse.ini file:
-Xmx8g
Memory size is given in Megabyte (m) or Gigabyte (g). Magnolia might work without adjusting the heap size, but if you get stack overflows, this will normally fix it.
See here for more information about the ''eclipse.ini'' settings.
3. Prepare Eclipse by adding plugins and configuring them
Start Eclipse.
On Linux/BSD/Unix you can do this by writing in a terminal
~/magnolia/eclipse/eclipse
On MacOSX you should write
open ~/magnolia/Eclipse.app
or double-click on the Eclipse icon from an appropriately placed Finder window. A similar action is used in Windows.
Eclipse will ask you for a workspace folder. Move to the magnolia directory, place the folder there, and select to use this as the default.
General Plugin Installation Instructions
We will now install several new plugins for Eclipse. You do not need to restart Eclipse until you have installed all the plugins.
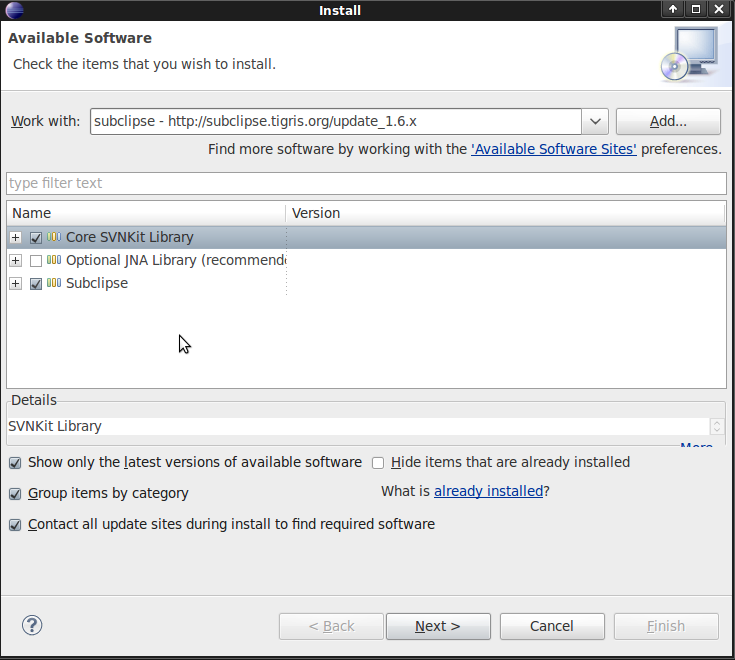
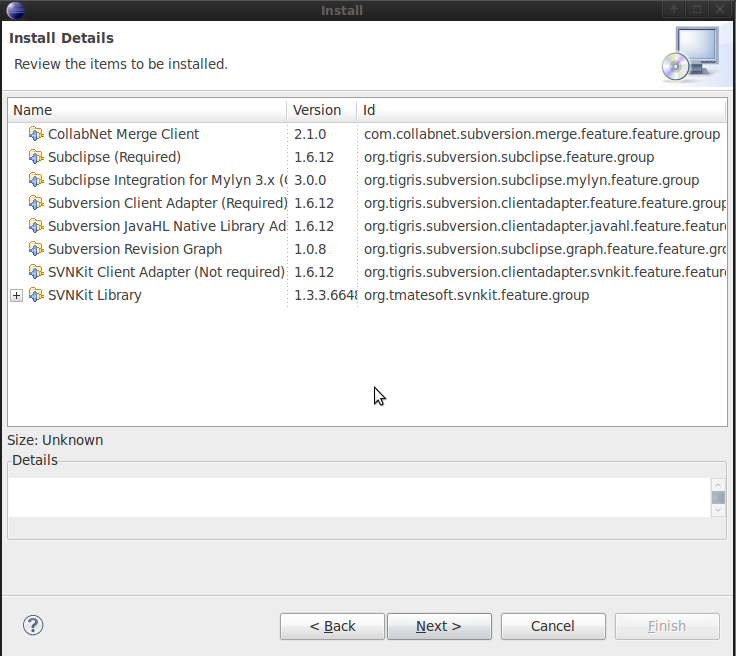
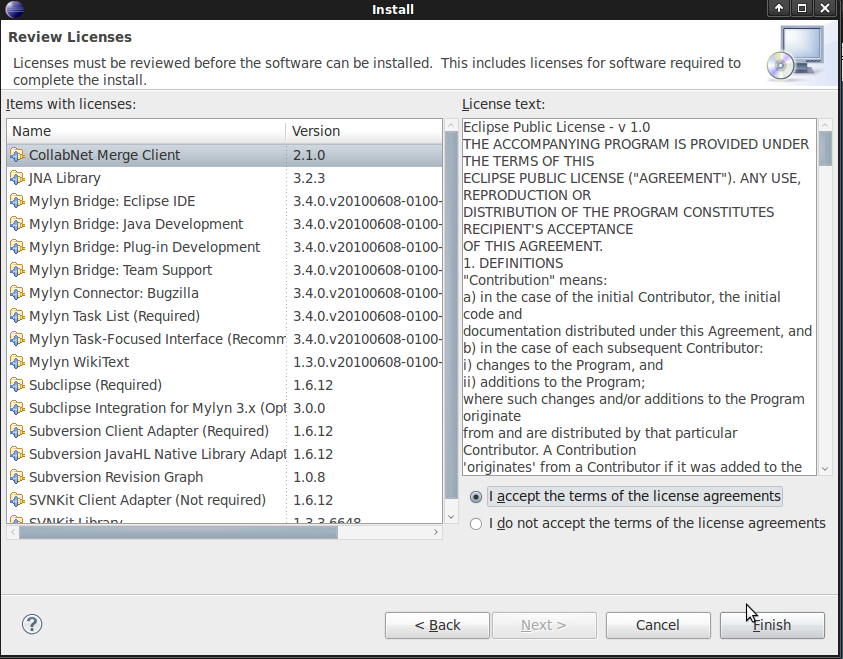
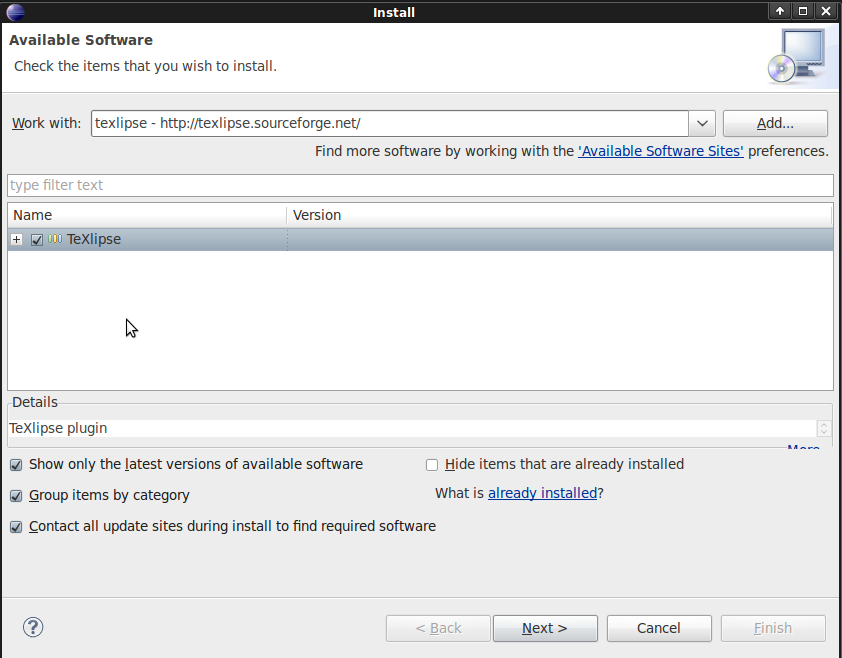
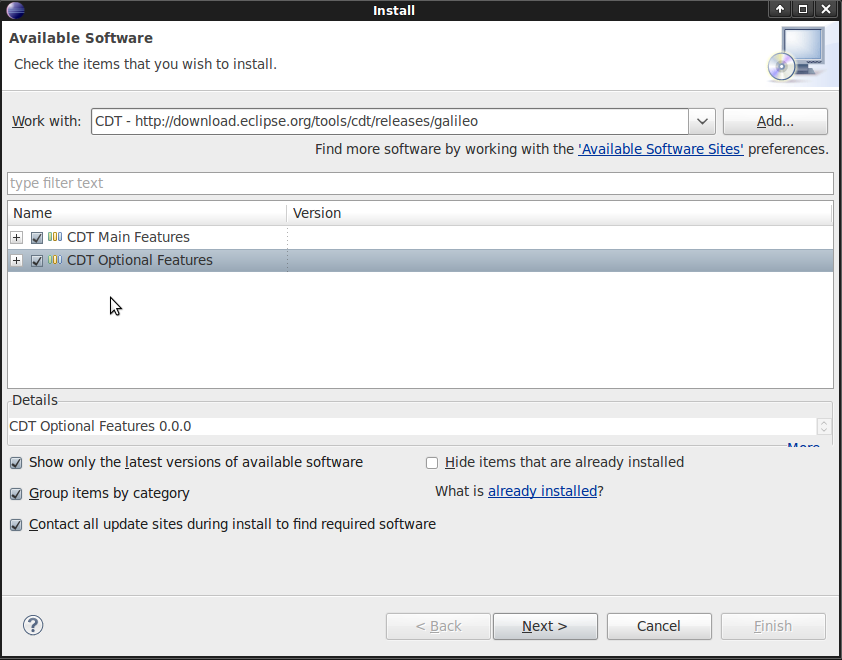
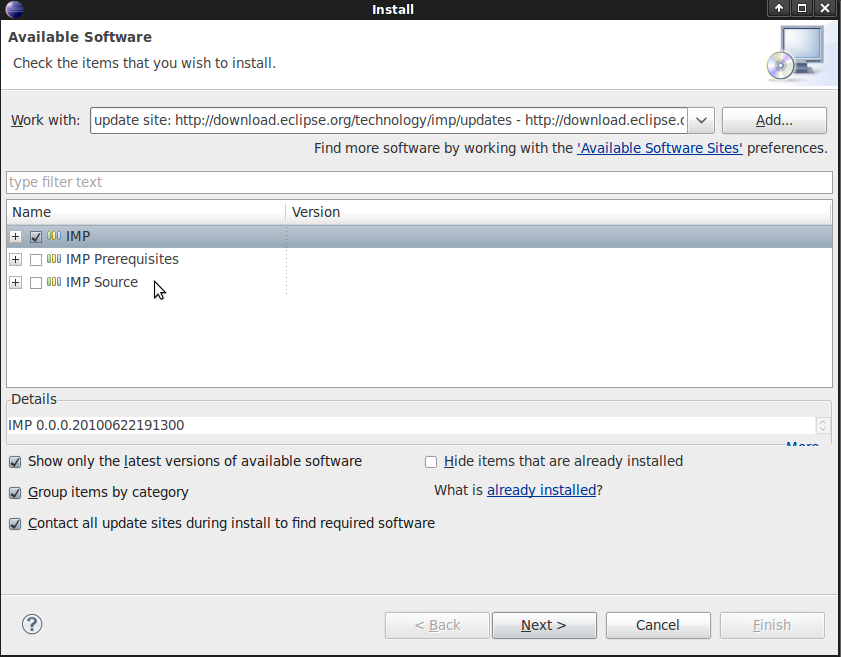
To install or update a plugin, go to Help → Install New Software. Enter the URL of the update site (provided below) in the Work with field. Make certain the Contact all update sites option enabled (it is on by default. Contacting all sites takes some extra time, but it saves quite a few headaches chasing dependencies). Select the desired plugin features, press Next, say OK to the license, press Next a few more times, then say OK to installing unsigned software. You can say no to restarting if you plan to install more plugins right away.
Installation tip: If your network connection is bad, or some of the servers are down, you'll need to restart Eclipse in order to try again.
Install Rascal and Magnolia plugins (absolutely necessary!)
Install Rascal and Magnolia plugins by adding the following update site to Eclipse:
There are two packages to choose. Select and install both.
Installing Rascal may give some warnings/errors about package conflicts.
In the "Install Remediation Page" select "Update my installation to be compatible with the items being installed" (second option).
This will typically remove C/C++ Remote Launch and TM Terminal package from Eclipse and will normally be sufficient to get Rascal to install.
You do not need to restart Eclipse yet.
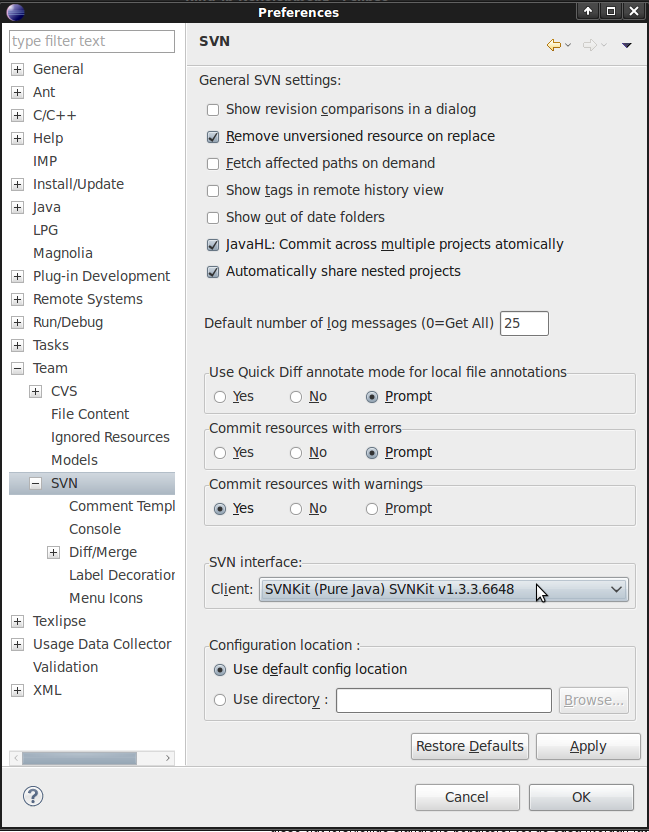
Install Subclipse (for accessing Subversion file stores with the Magnolia Libarary)
Install "Subclipse" from the Eclipse Marketplace… in the Help menu.
Untick JavaHL in the list of packages that appear.
Restart Eclipse
Restarting Eclipse now will activate all your installed plugins.
Emacs Keys (optional)
If you're an Emacs follower, you can choose Emacs-like keybindings by going to Window → Preferences → General → Keys, and then selecting Emacs as the scheme.
If you have a Norwegian / Scandinavian keyboard, you may also want to bind Undo to Ctrl+-.
Add a Magnolia Eclipse button to your desktop (optional)
You can optionally add a Magnolia Eclipse button to your desktop or menu (consult your desktop environment for how to do this).
4. Compiling and Running Magnolia Programs
The Magnolia plugin contains a compiler from Magnolia to C++ 2011. Download the Magnolia basic library and get started. Go to menu File → New → Other…, choose SVN → Checkout Projects from SVN, create a new repository location, and fill in the Location
https://svn.ii.uib.no/r/magnolia/trunk/magnolia-basic-library
Then download all of it to the default Eclipse workspace location.
The Magnolia compiler automatically starts when the project has been downloaded. The compiler is slow, so this will take about half an hour. You can track the process in the Eclipse progress view, Window → Show View → Progress, though this information is often misleading. After Eclipse is finished generating the C++ code, you are ready to compile the source and run a few tests.
On Linux/BSD/Unix/MacOSX open a terminal window
cd ~/magnolia/workspace/magnolia-basic-library/cxx
./make -j4
(The -j4 option runs 4 compilers in parallel on the generated code, and is only useful on a multicore system with more than 4 cores. Change the number, or remove the option, as you see fit.) The make command will create several executables (also a time consuming process) and run some tests.
You are now ready to follow the tutorial examples in folder TutorialExamples and start coding in Magnolia.
To execute the hello world'' program in tutorial 0, simply type (in the terminal, at the cxx location)
TutorialExamples/Tutorial0Cxx/welcomeCxx hello
Whenever you add or save a modified Magnolia file, Eclipse will automatically recompile the part of the Magnolia system that depends on the modified file. When recompilation is finished, you can run the make file as above to create an executable and test your programs.
When you are ready for serious Magnolia development, you should switch off automatic compilation: Untick Project → Build Automatically. You can now compile Magnolia files by clicking the build package button (leftmost of the three Magnolia buttons on the top of your Eclipse Window). Clicking this button will also do a complete type checking of your current file, otherwise hovering over a module (signature, concept, implementation, satisfaction, program) name will type check and list the declarations within that module. You need to save the file before hovering/building will take effect.
Happy coding the Magnolia way!
Attachments (7)
- svn.png (62.4 KB ) - added by 14 years ago.
- svn2.png (65.2 KB ) - added by 14 years ago.
- svn3.png (140.6 KB ) - added by 14 years ago.
- tex.png (55.1 KB ) - added by 14 years ago.
- cplusplus.png (61.2 KB ) - added by 14 years ago.
- imp.png (59.7 KB ) - added by 14 years ago.
- sophus.png (104.6 KB ) - added by 14 years ago.
Download all attachments as: .zip