Location: North 46:13.196, East 010:39.836 (GPS on the summit)
Difficulty: YDS class 4, PD-
Climbed July 19. 2004.
Information:
How to get there:
A natural starting point (location of reference) is the famous
winter sports resort Madonna di Campiglio, north west of the
larger city Trento.
From the south end of the city tunnel, drive about 6 kilometer
south on Hwy. 239 in the direction of Trento. Notice four hairpin
curves (Tornante) on the road. After these a more straight section,
prepare to turn right and leave this road in the next hairpin
curve (a left turn). You are now on a much smaller road that climbs into
Val di Nambrone. This road can be closed with a gate, there is also a
posted traffic sign (red circle on white), meaning no entry. However,
it is appearently ok to ignore this sign, in fact, later in the day the
sign had been turned. Perhaps it is meant to allow daytime traffic only.
Thi road first runs on the right side of the valley, then crosses the river
and starts climbing the west side of the valley. Count 14 hairpin curves
(Tornante), shortly after the last one, there is a side road going left.
This is the traihead, park off the road, about 10 cars should have no
difficulty finding a spot here. This place is about 9.5 kilometer after
leaving the main Hwy. Elevation 1911 meter, location North 46:12.448,
East 010:44.210. Route description:
This route can be divided into four sections.
From the trailhead, start hiking a short section up the (farm) road
that forked left from the main valley road. Do not cross the river,
but continue west a bit more uphill along a trail on the right hand side of
the river. Higher up, you reconnect briefly with the farm road. Just as
this road heads down a small hill to a building, take the clearly marked trail that forks
right. Shortly, you will cross a river on a nice wooden bridge.
The route now heads north, more steeply up in order to
gain the ridge that runs east-west, parallel above to your right.
There is also a sign here pointing to refugio Segantini.
Follow this clearly marked trail up to the ridge, then left (west) along the
top of this broad and gentle ridge until you arrive at the mountain hut, refugio Segantini
located slightly off to your right as you complete the last few steps along
the ridge trail.
There is a sign to the Presanella trail
at the refugio. This leg from the refugio to a fine saddle on the ridge west of Monte Nero is the
second section of the climb. From the refugio, head north on fairly level ground, marked with
red circles on white for the very initial part.
The trail follows the water supply to the river, where you look into a valley going north-west.
Cross the river here, following the marked path to
the other side. You are now right in front of a pretty large moraine ridge that
separates two valleys. The trail climbs this moraine head on and follows the ridge line
all the way until the final slope up towards the small glacier (more like permanent snow)
below the very distinct peak named Monte Nero.
My understanding (from a guide book) as well
as my 1:25.000 map indicated that the route should climb the
broad ridge above the refugio, then traverse right higer up onto a smaller glacier
before approaching the saddle below Monte Nero. Such a trail is indicated
on the map, while the correct trail is not marked. Consequently, we ignored the proper
trail and hiked cross country along this route. It is a perfectly possible approach,
but the trail on the moraine ridge is clearly more convenient and better. Climbers should
be aware of this difference between the map and reality.
Ascend this small glacier on a climbing traverse heading (west) towards the low saddle on the ridge
below Monte Nero (3344m). This saddle is called Bocchetta di Monte Nero and has elevation
3162 meter. When ascending the glacier, this is the second gap in the ridge counting from
the left. Leave the glacier and traverse a bit right among rocks to climb the saddle on
a clear path in loose gravel and scree. Upon reaching this saddle, the second part of the
route has been concluded.
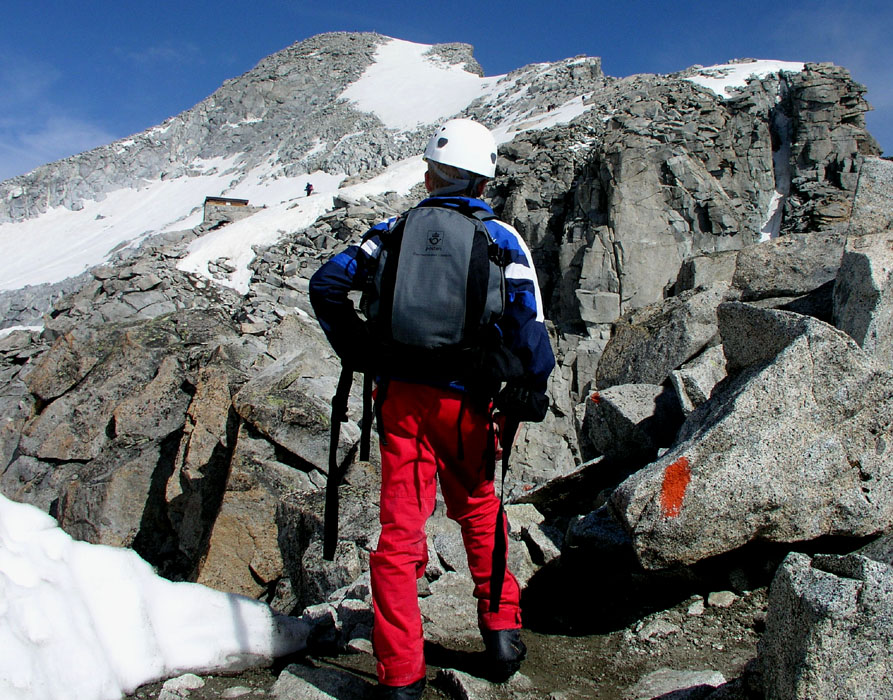
The third leg of this route has more variation and is the most challenging part.
You will immediately discover that the west side of your saddle is a steep cliff
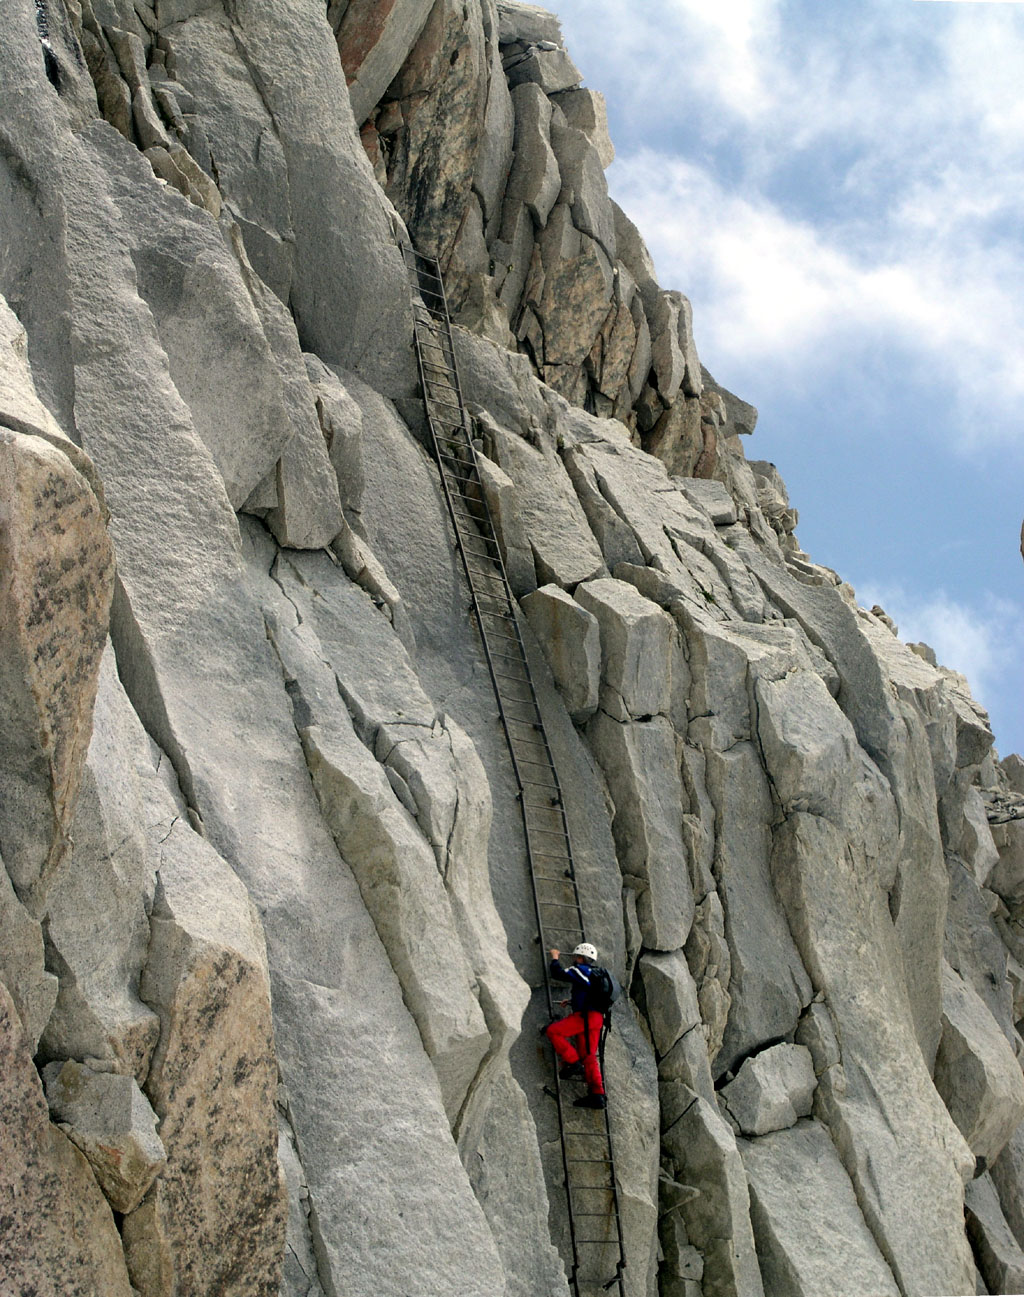
above the small glacier located in a separate valley on that side. Traverse north on
a good ledge with good holds (exposure) to the top of an iron ladder bolted to the
cliff wall below you. Downclimb this (fairly long) ladder to reach the glacier below.
Continue up this glacier, heading north-west, the route stays closer to the right
side, until you leave the snow in order to reach a broad saddle above you. The first
fifteen meter is (YDS) class 4 climbing, there may perhaps be easier variations nearby.
We ascended up along small cracks, or alternatively along a very distinct, but
narrow ledge in order to gain a narrow ramp going left (with a cliff above it), to easier
terrain, see pictures below. The remaining stretch to the saddle is easy scrambling, partly
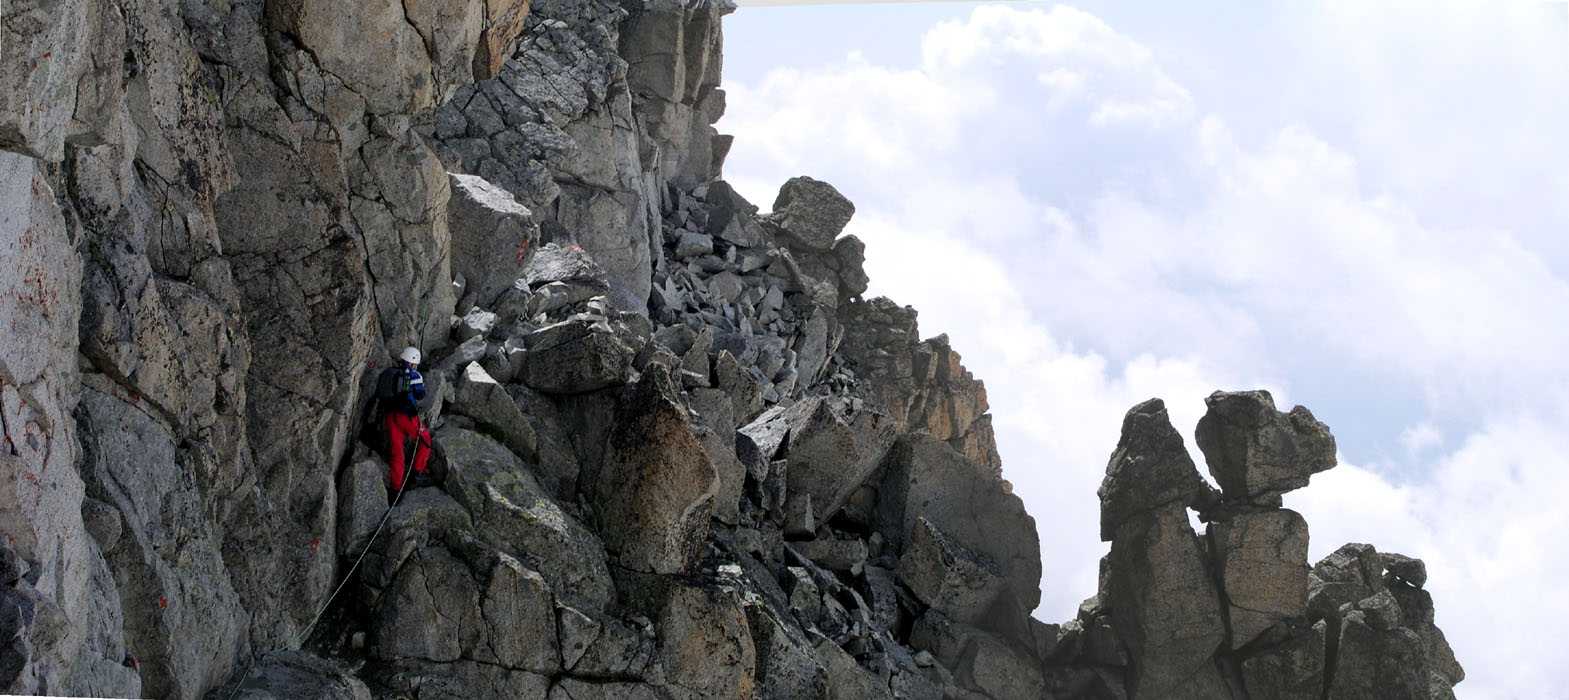
on moderate snow. The route continues more left and ascends the ridge that connects further
towards the summit of Presanella. Alas, there is still a problem, since this ridge narrows
and turns into a serious traverse just before reaching the small hut Bivouac Orobica
alla Presanella, 3382 m. The route avoids this problem by descending left and gain a
distinct gully that can be climbed easily to regain the ridge near the hut.
This section was protected by a fixed rope when we where there. The climbing does not
exceed (YDS) class 4, as you first descend then traverse along a narrow ledge to reach
the gully. This gully can be filled with (icy) snow, we climbed below, one may need
crampons or active use of an ice axe in order to safely cross to the opposite side.
Easy scrambling now brings you to the top of the gully and the bivouac hut.
The last and final section of the climb is along the ridge from the hut to the summit.
We had snow all the way, the best route stays close to the steep north-east side. There
are cornices here, so a safe distance to the drop must be maintained. Visible rocks provide
guidance. An ice axe should be carried for safety, with different snow conditions
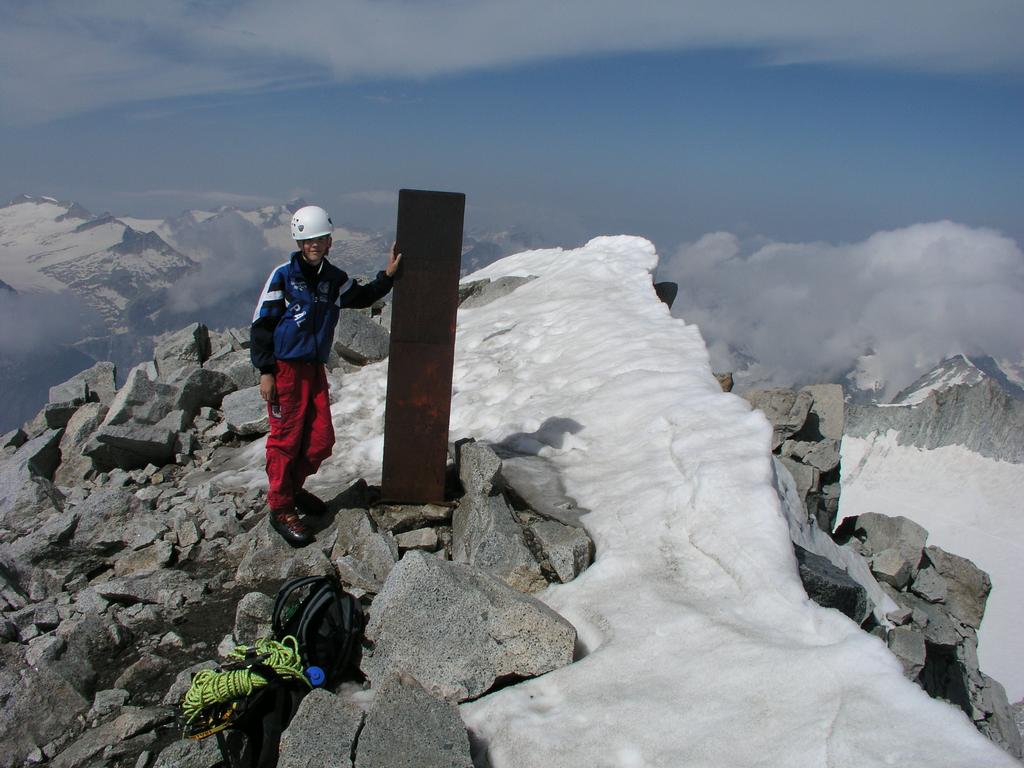
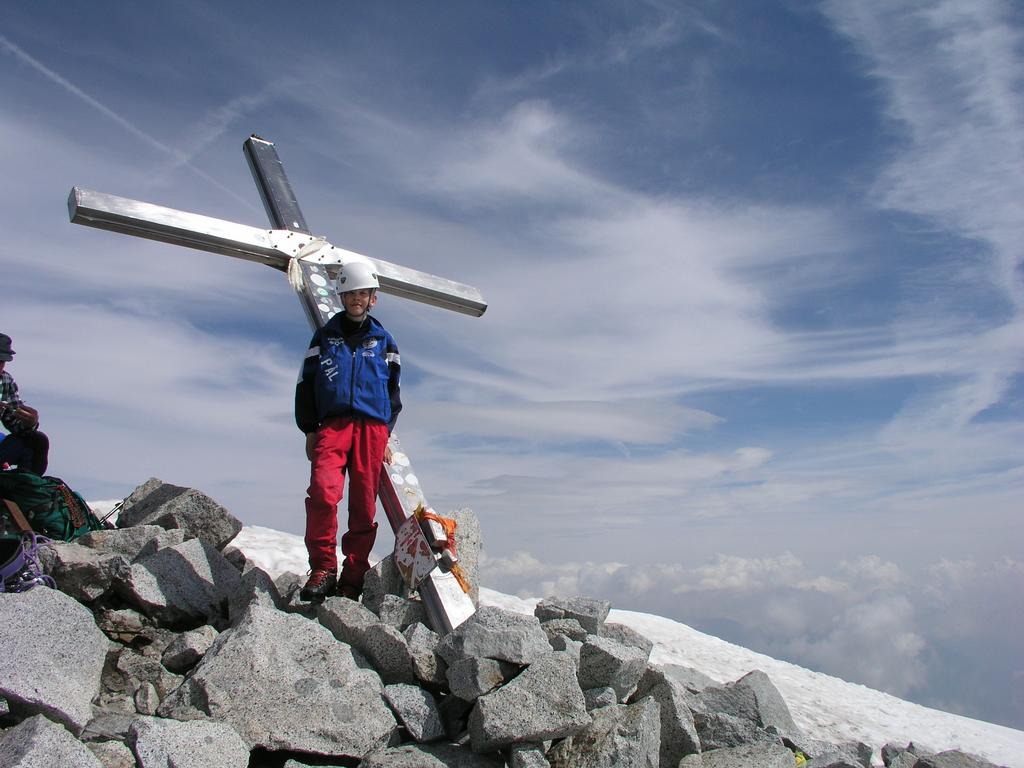
(more icy surface) crampons may be needed. The slope is never very steep and soon you will
approach the summit with a large cross (that is about to fall over), and a marker slightly
higher a few meter further along the summit ridge.
The descent route reverses the route of ascent. Comments:
I did this climb with my son Pål Jørgen, age 15.
We started out from Madonna di Campiglio at 0515, parked at the
trailhead, prepared for the day, then began hiking at 0600. After a brief rest at the
Rifugio Amola "Giovanni Segantini" at 0700, we continued up the ridge from the refugio
(off the trail for the first hour, see above), and reached the summit at 1045. Half an hour
rest with sunshine and a fantastic panorama, however, the clouds kept building
so departed at 1115 and reached the car at 1445. Almost 9 hours with a good
mix of trails, 1700 meter of vertical gain, snow (tiny glaciers), rock scramble as well as (YDS) class 4
climbing, topped off by a touch of Via Ferrata, a vertical ladder on the rock.
The next day we continued on to Monte Baldo.
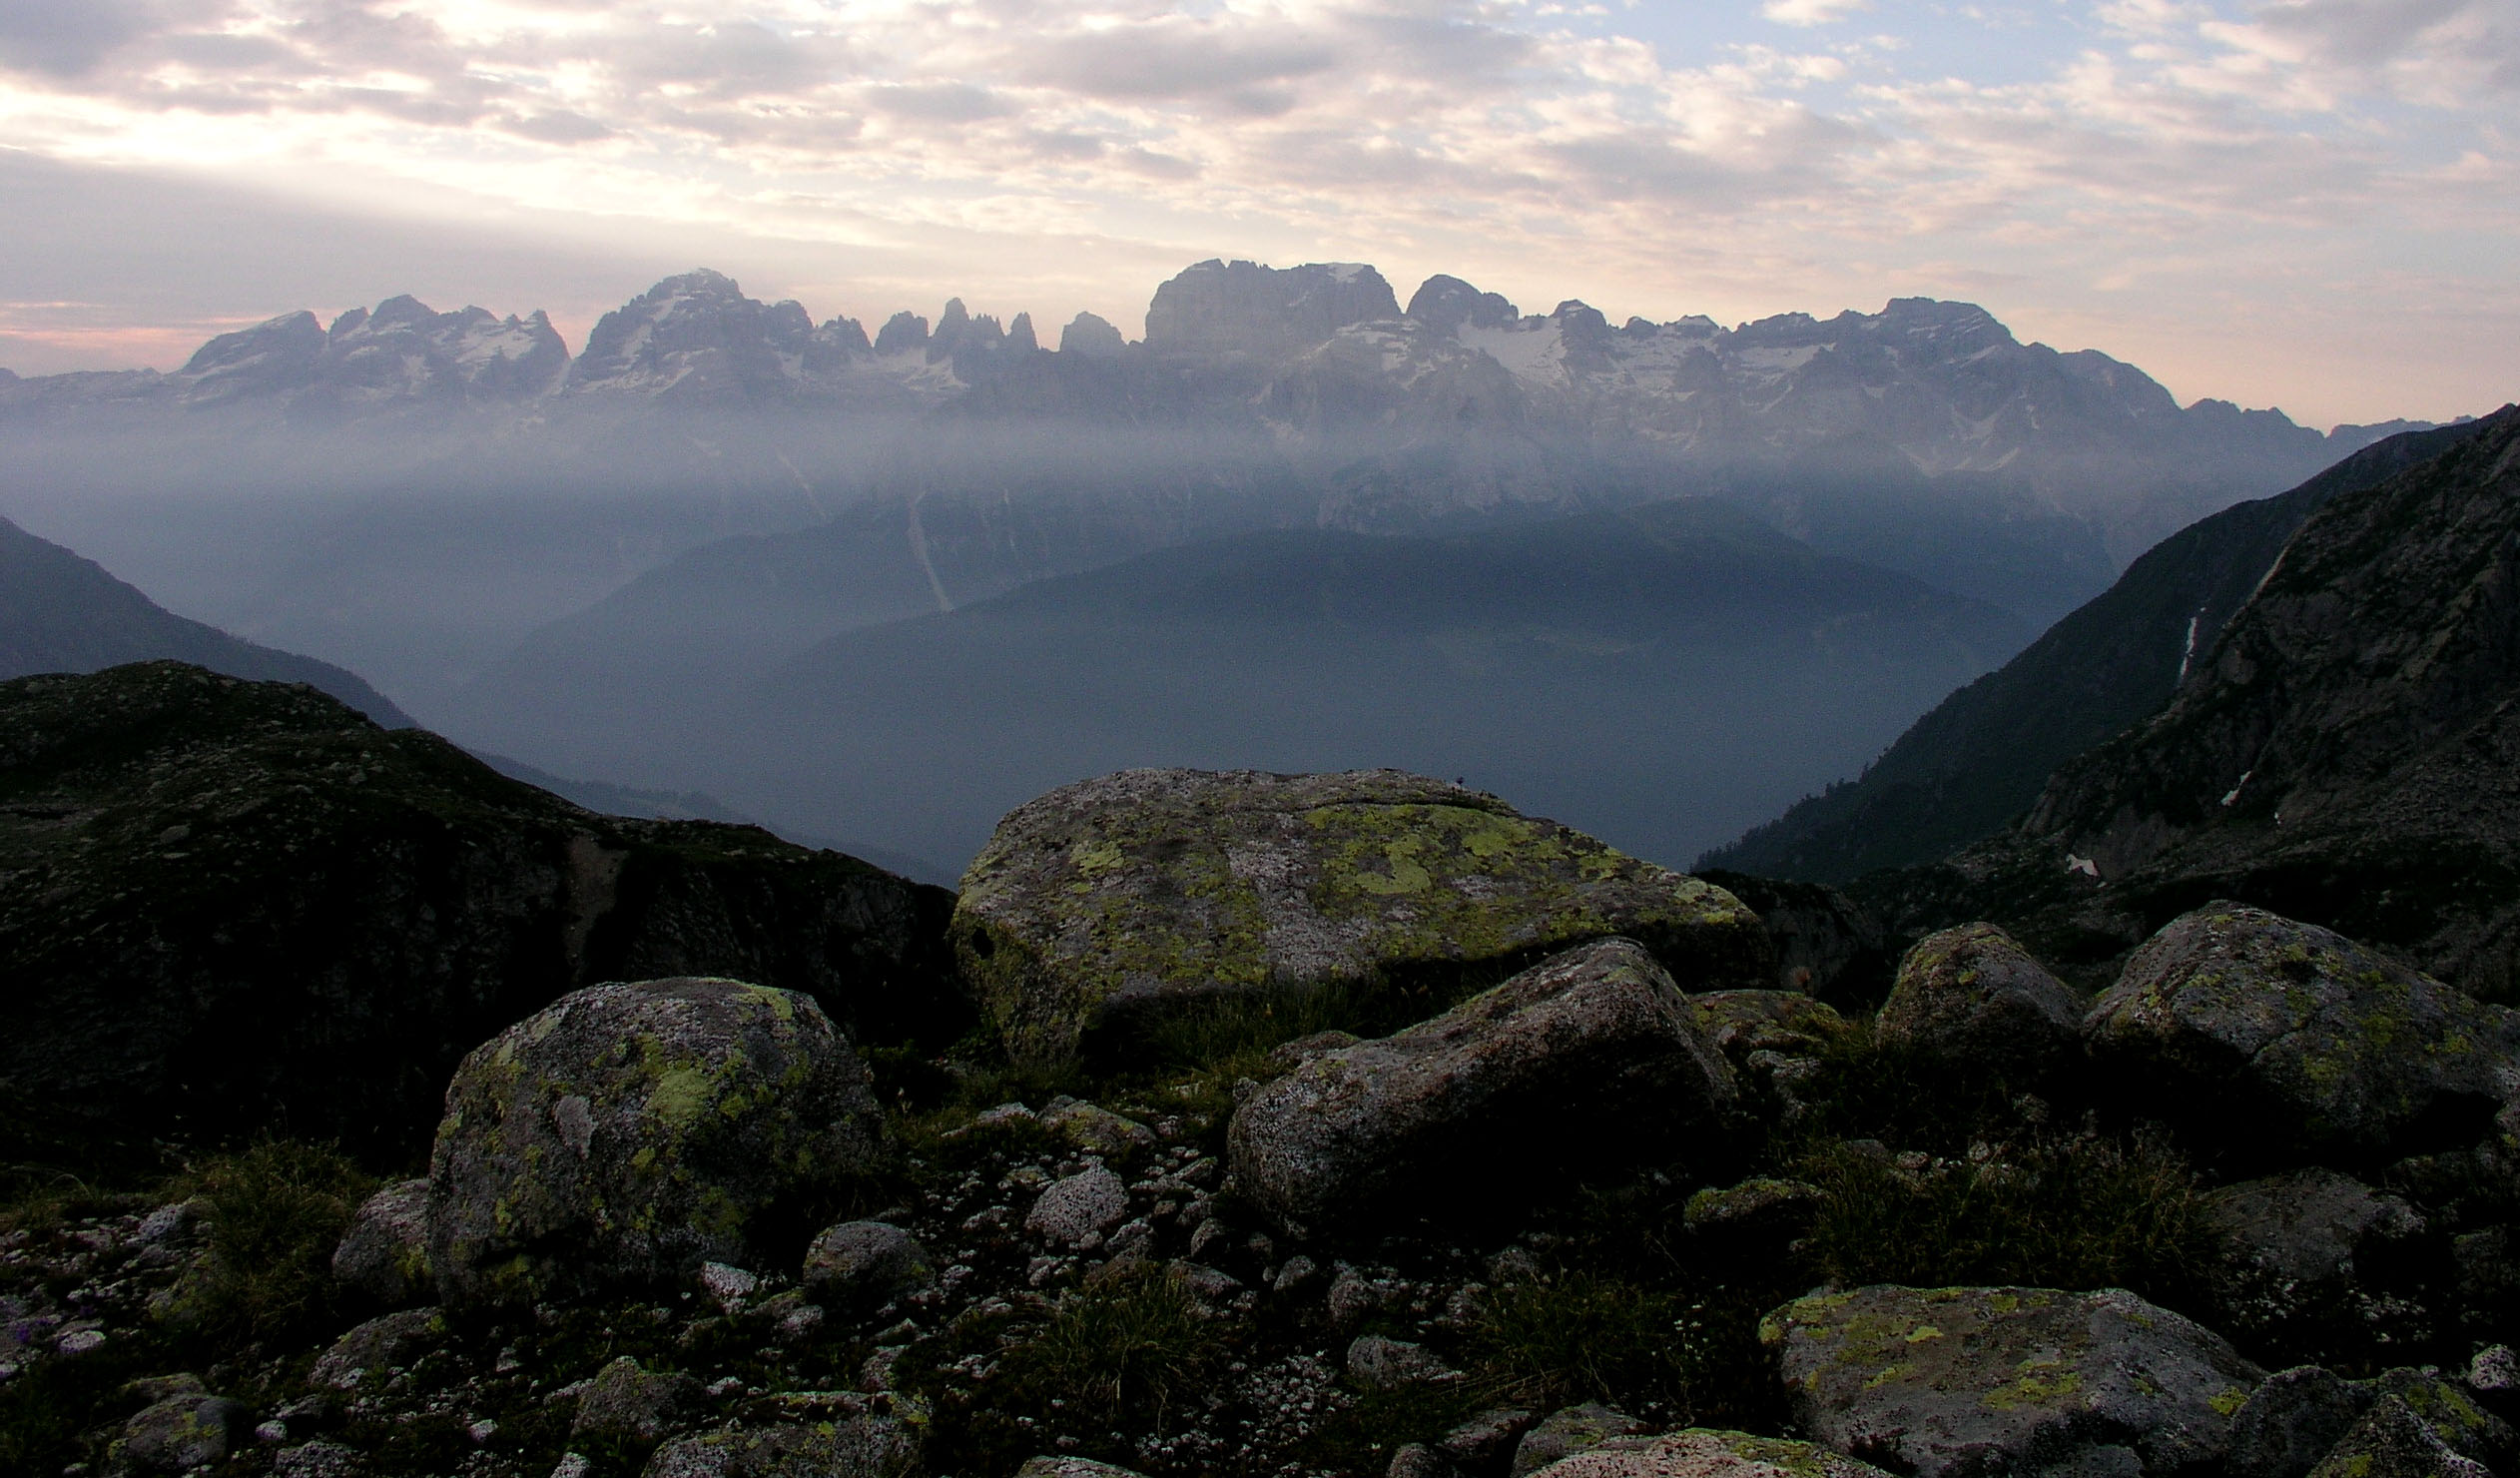
The Brenta group,
morning view from the first ridge.
The highest is Cima Tosa, 3173 meter.
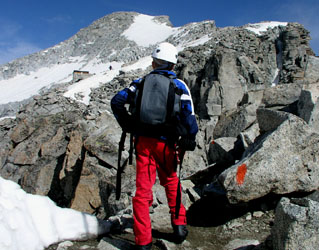
The first part of 3rd. leg,
looking back towards the
Brocchetta di Monte Nero saddle. The route crosses the snow below, then
steeply up the rocks.
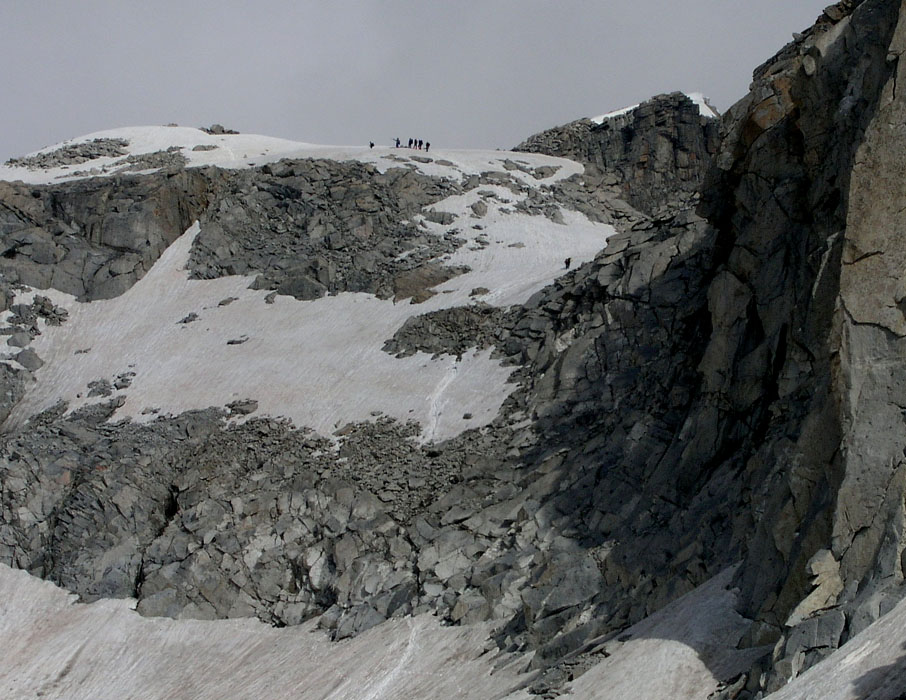
Part three of the route,
after descending from the Brocchetta di Monte Nero saddle,
cross the small glacier and climb the rockband then further to the
saddle and onto the ridge leading towards Bivouac Orobica.
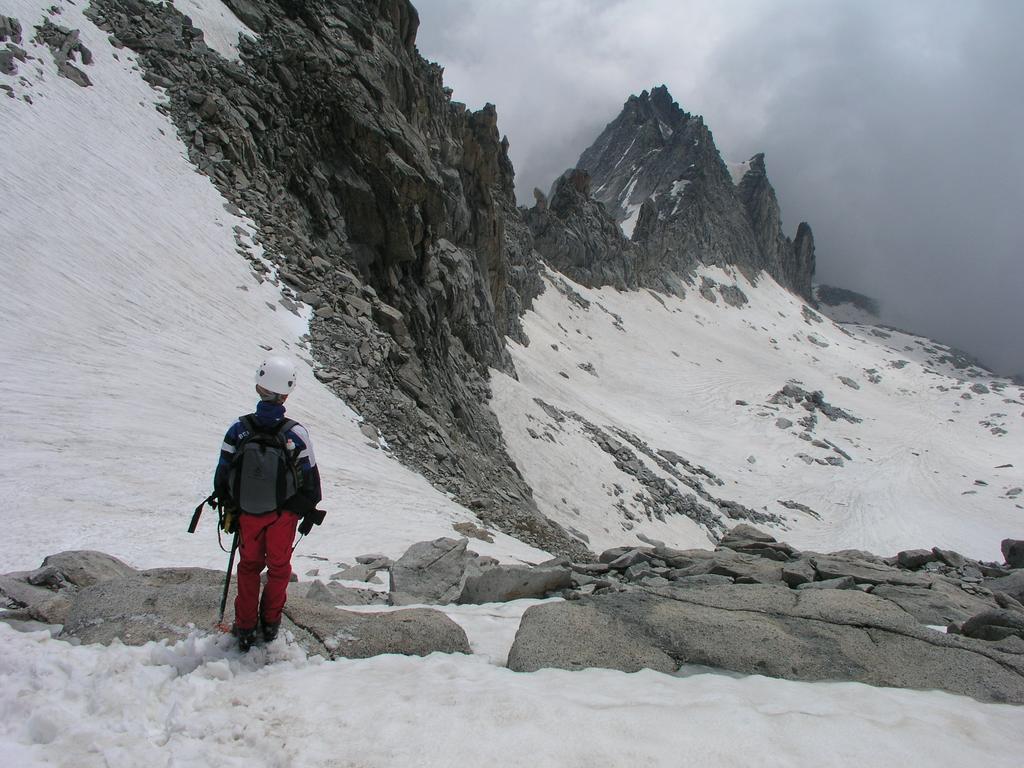
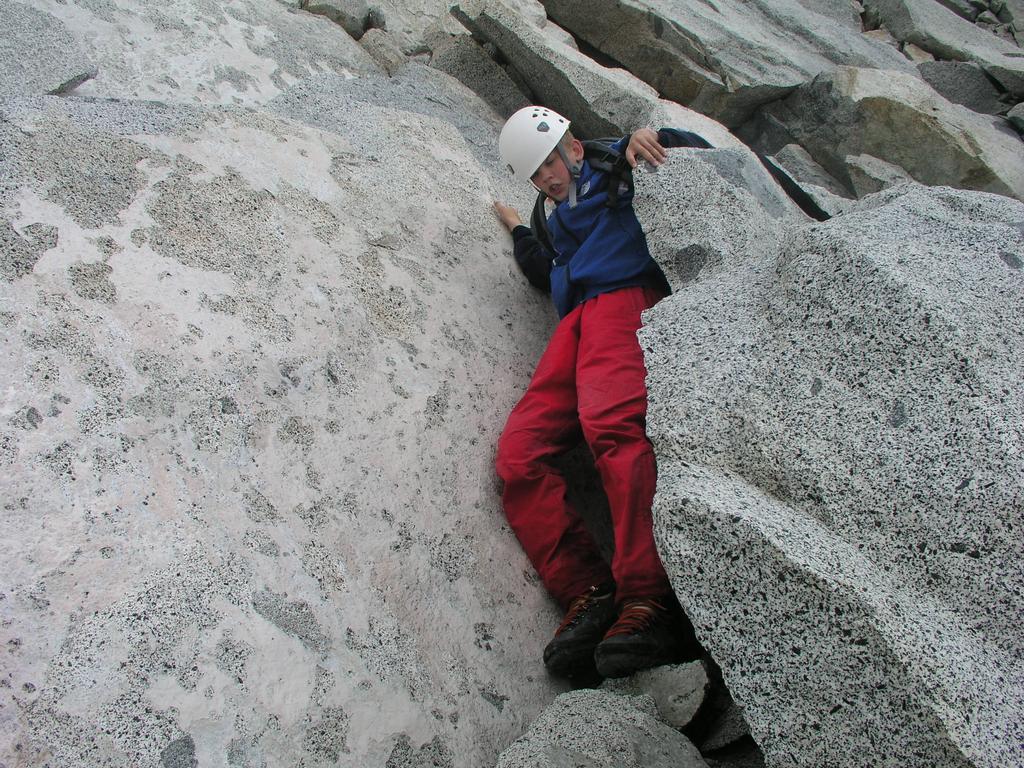
Presanella, På Jørgen on the ridge
before Bivouac Orobica.
Traverse
below the ridge below the Bivouac Orobica.
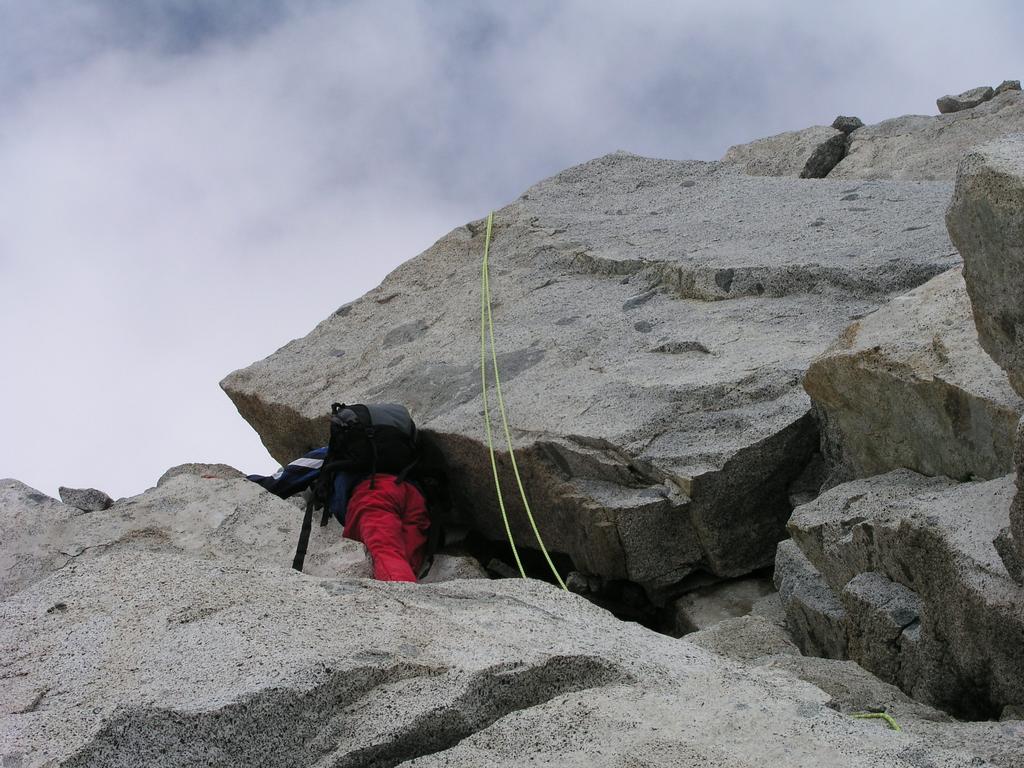
The narrow ramp,
the terrain is easier above here. The picture is taken
while down climbing. A rappel piton was located above, but we
ended up not using it.
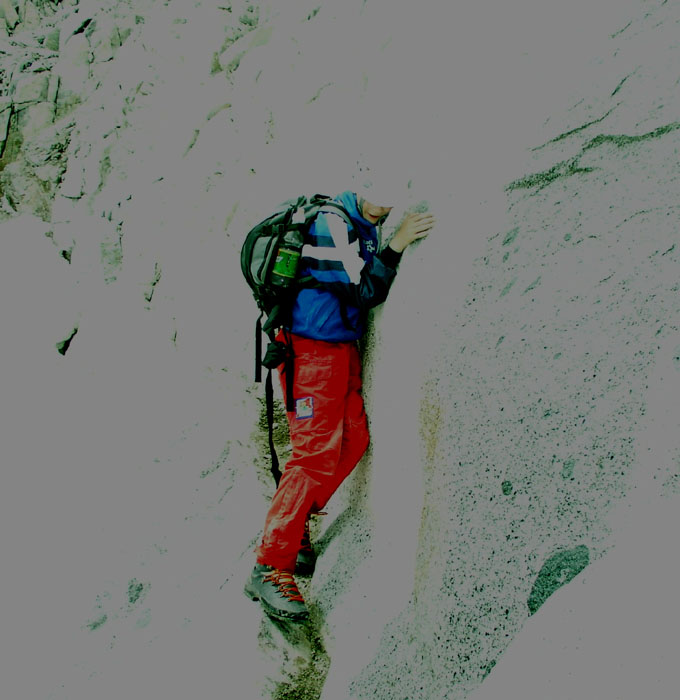
Further down,
Dad took an alternate route with slightly more space.