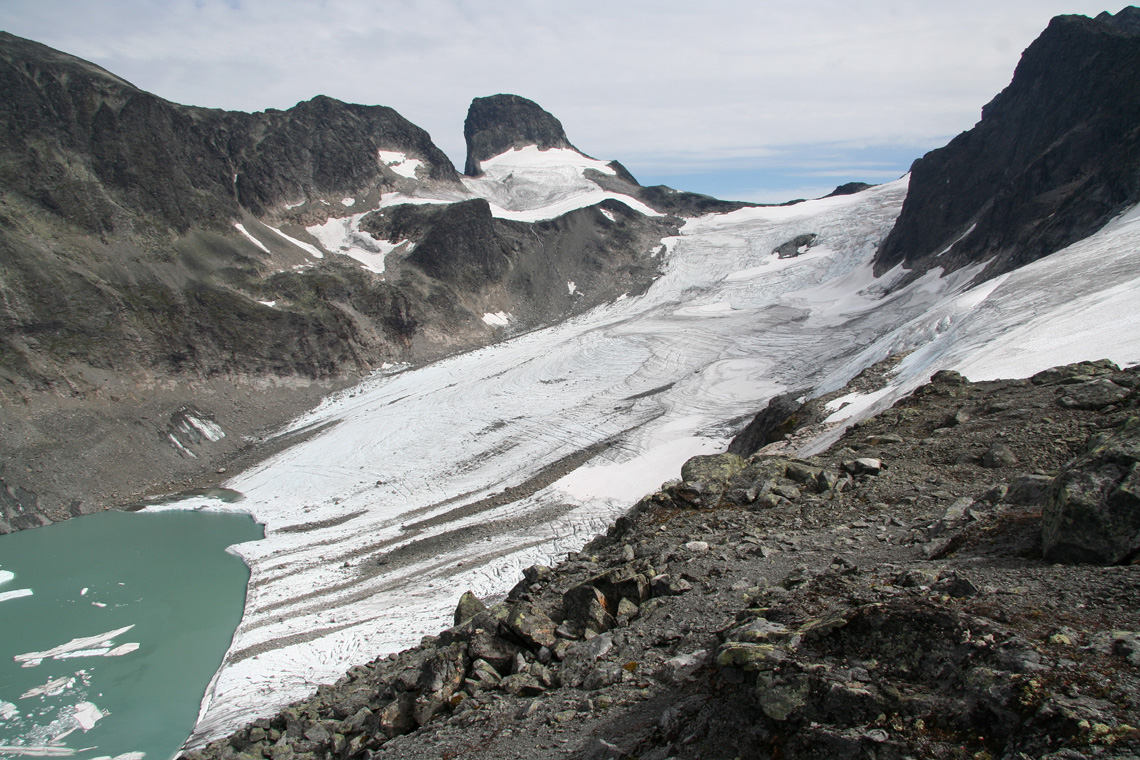
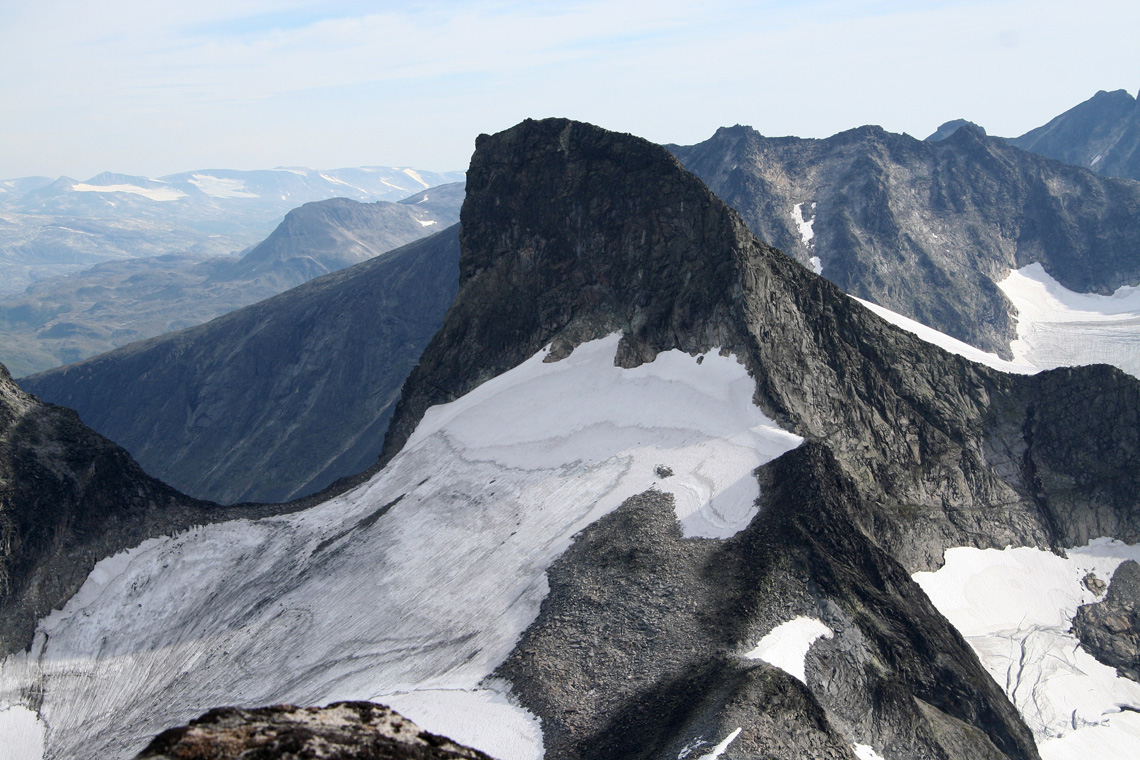
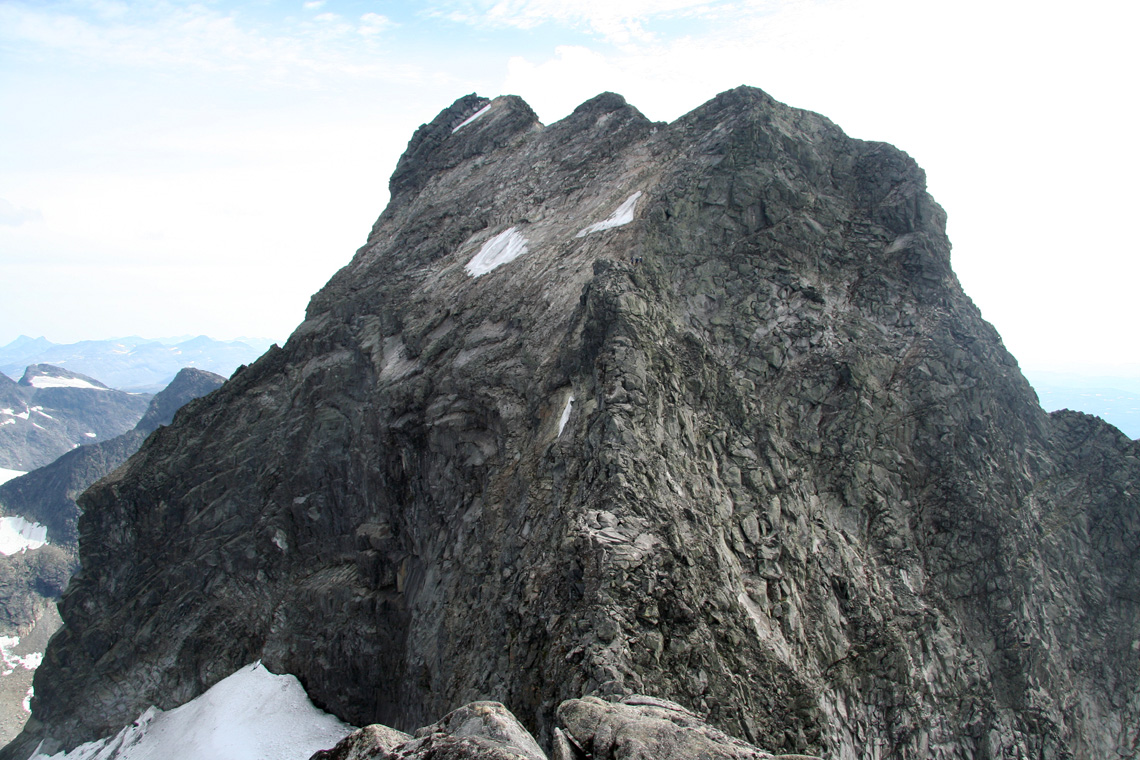
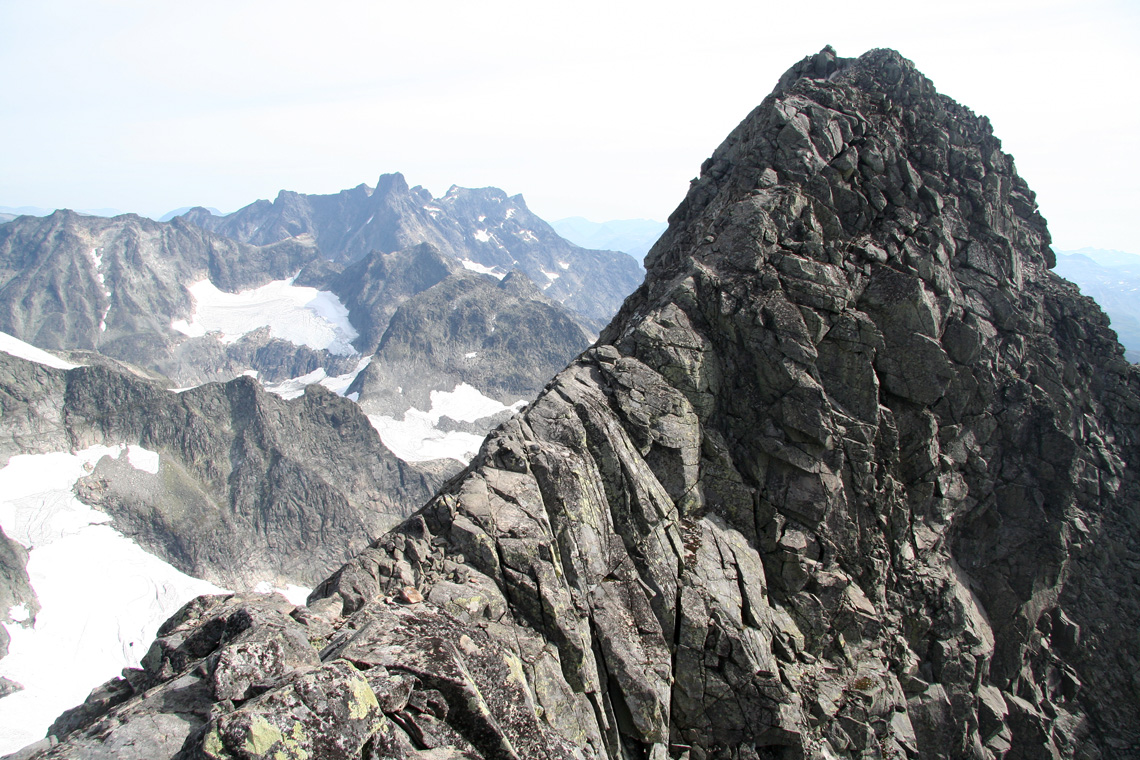
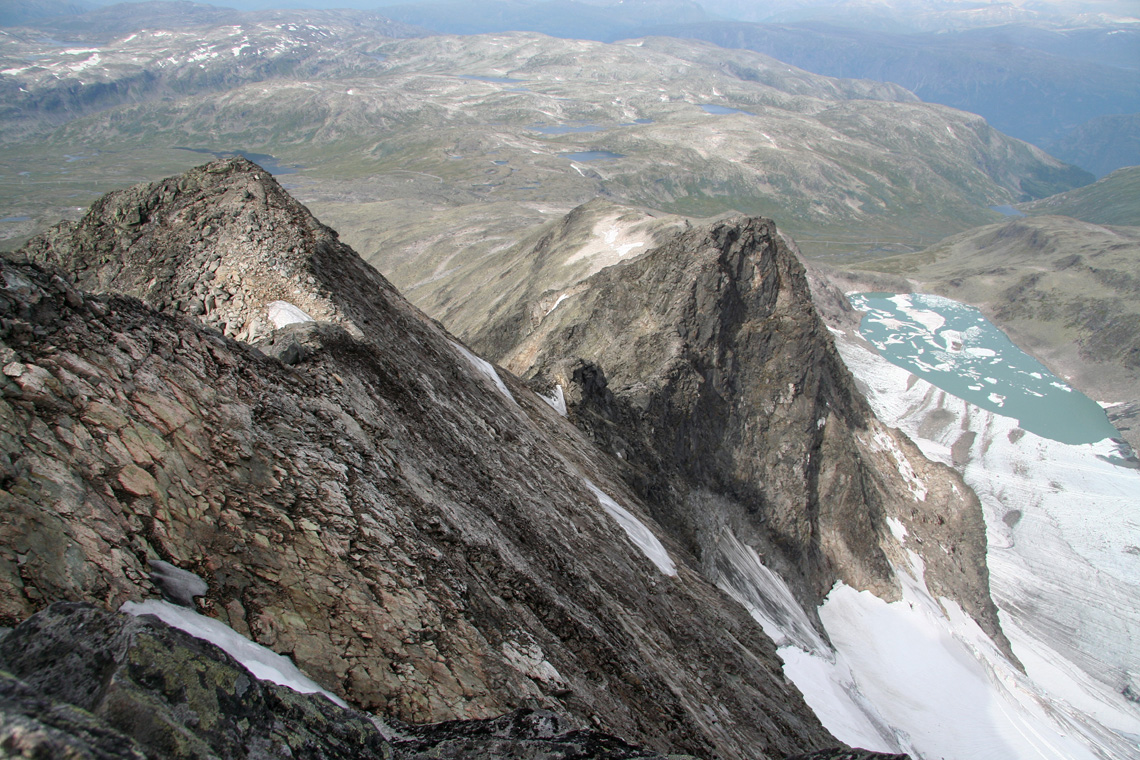
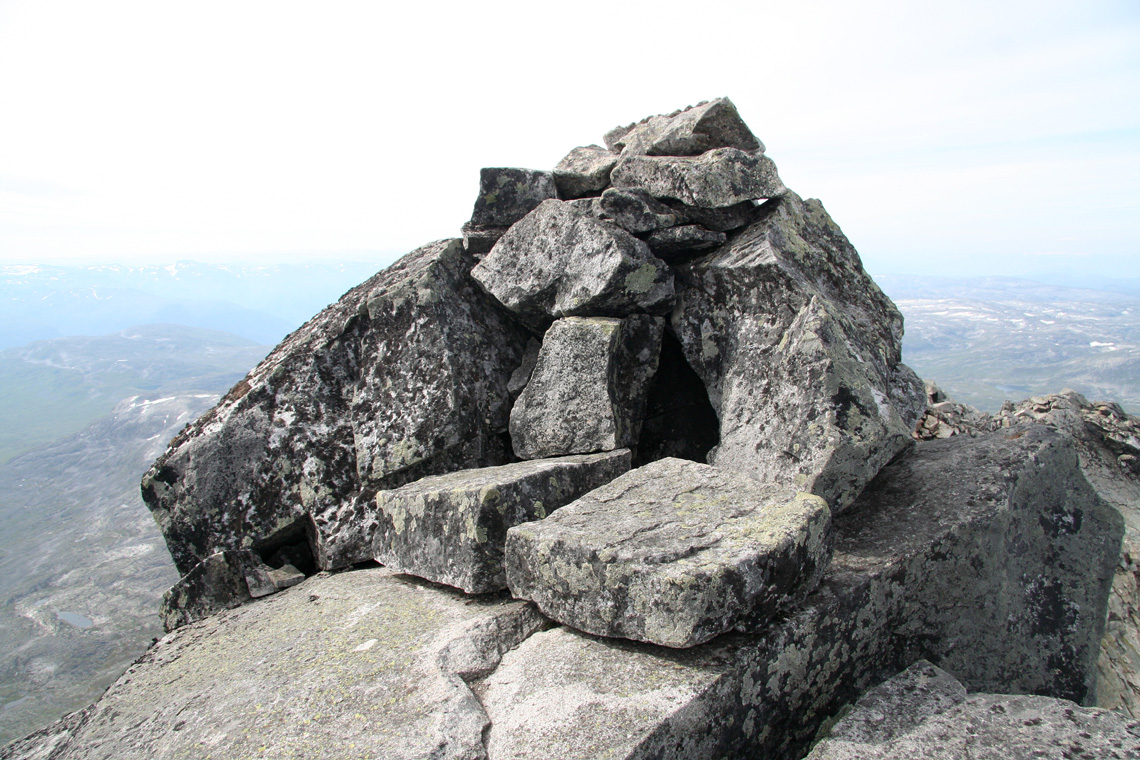
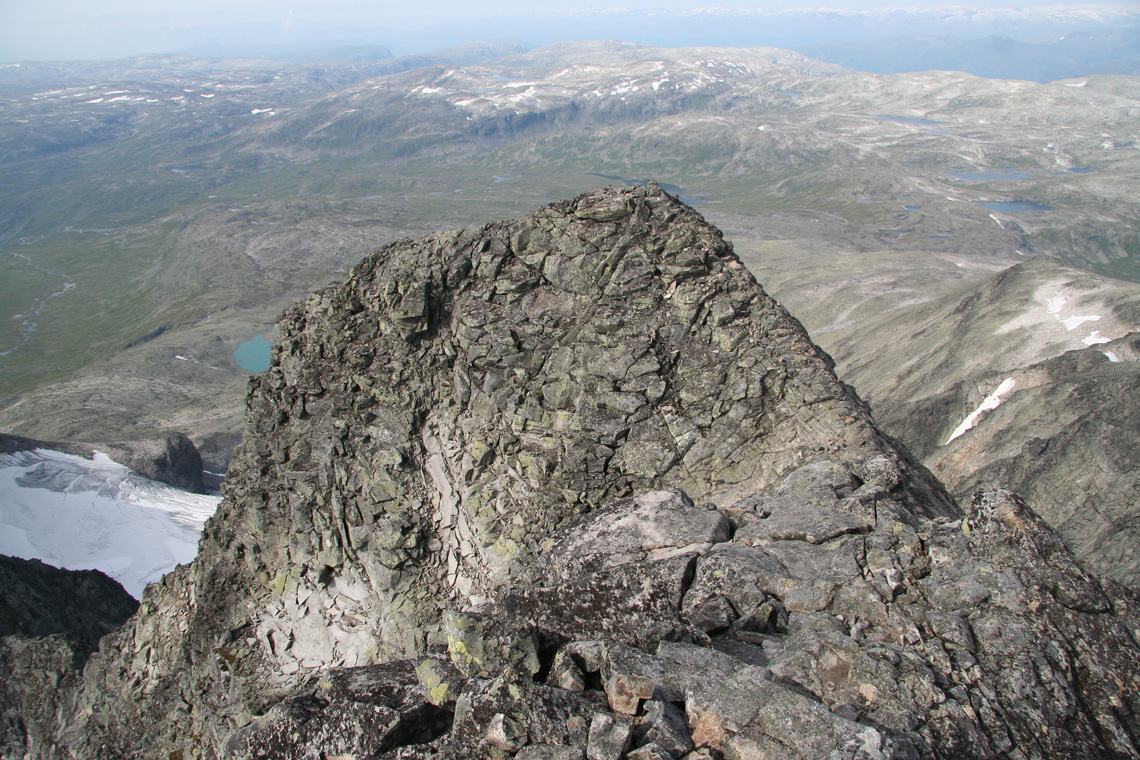
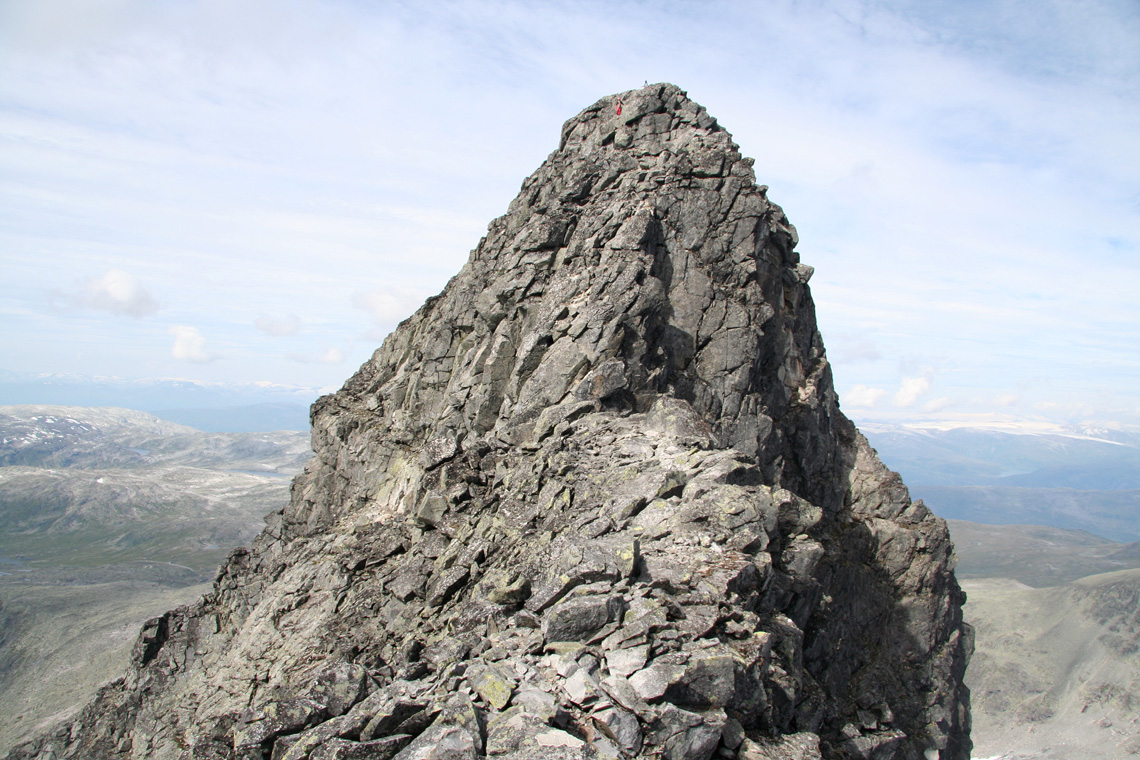
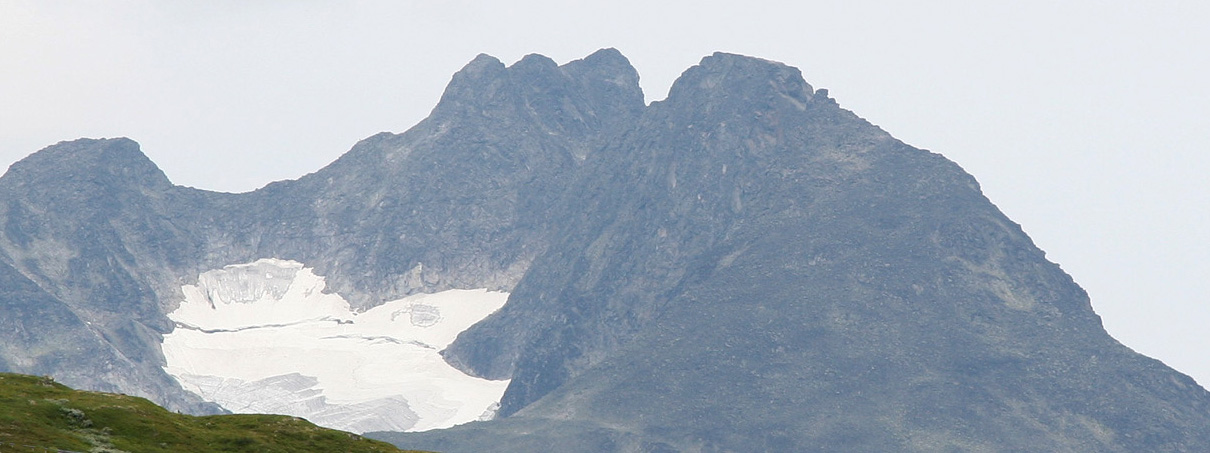
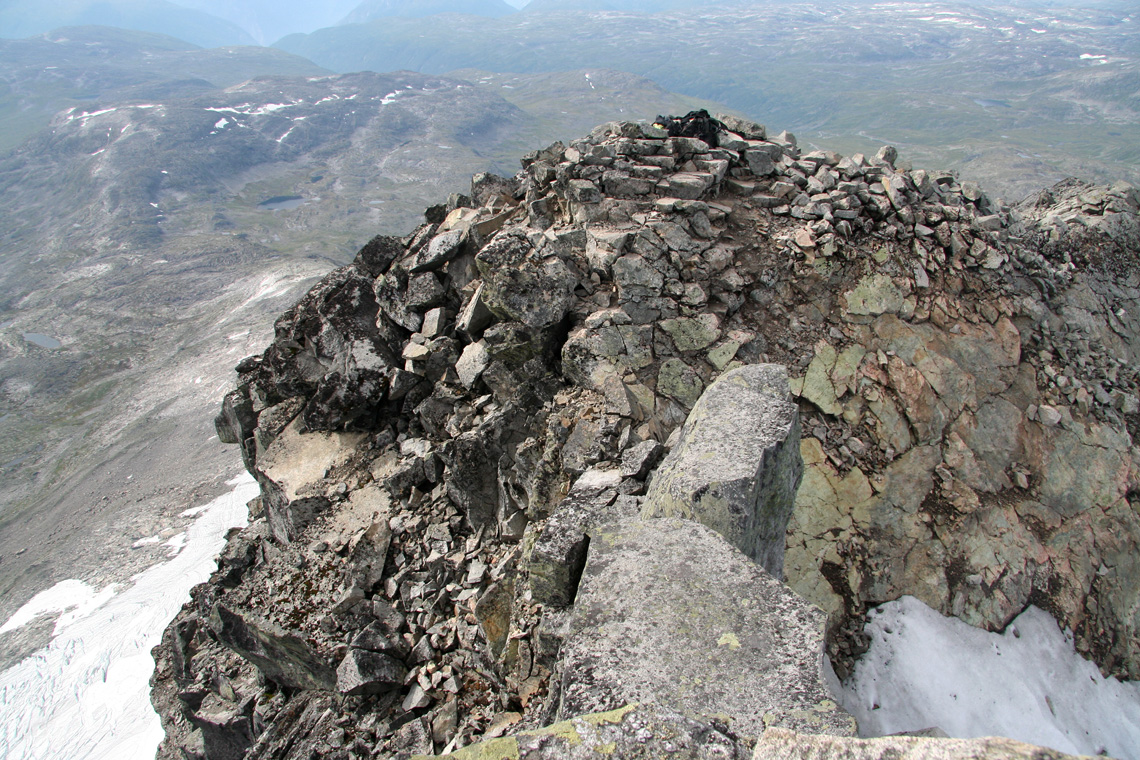
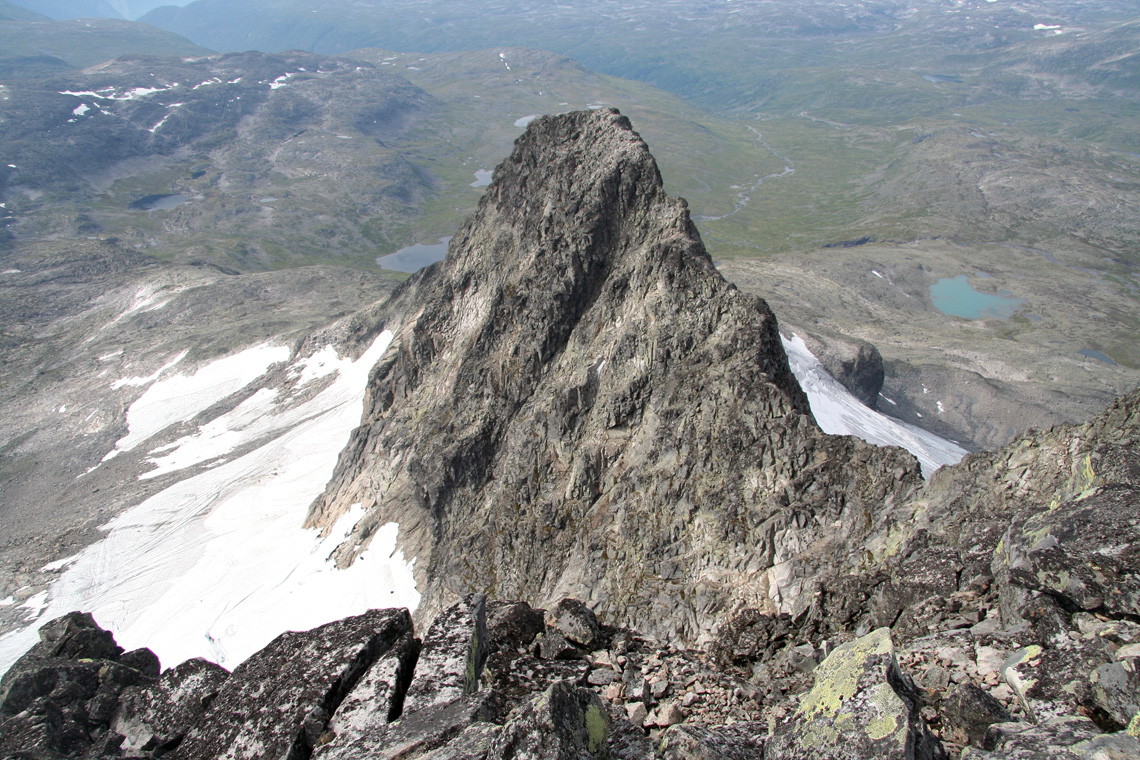
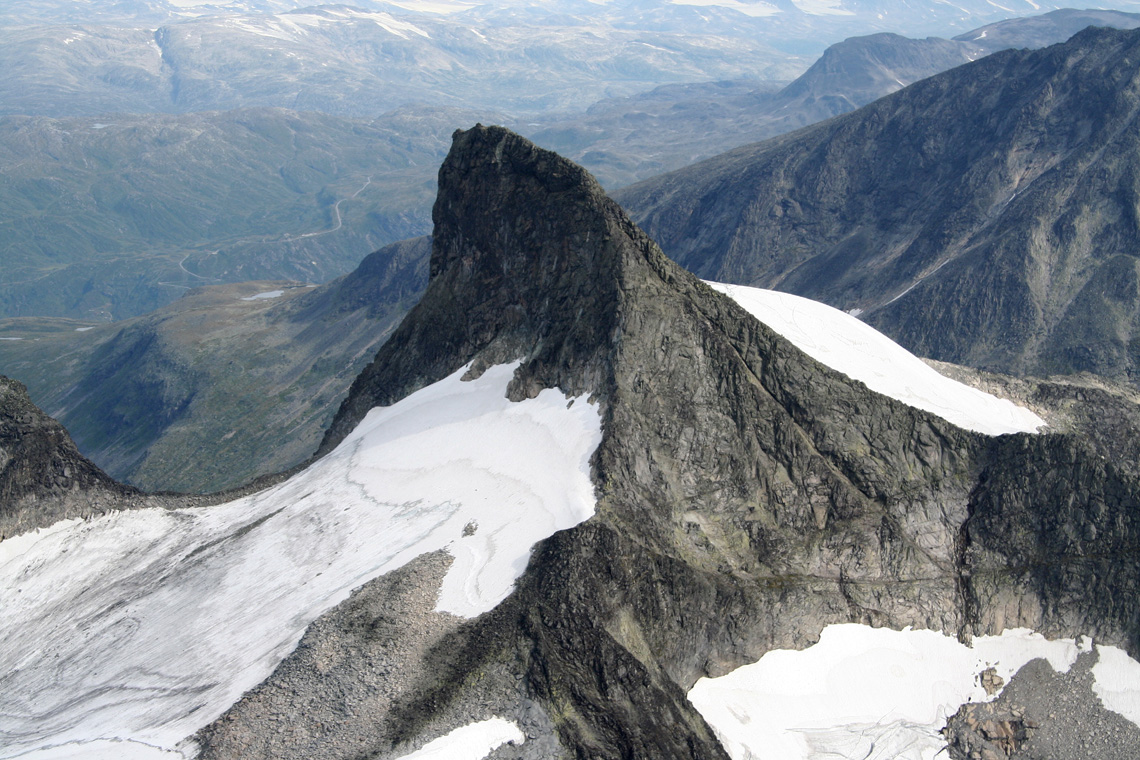
Store Austabottind

  • Store Austabottind
  • 2204 m.
  • Primary factor 474 m.
  • Location: Jotunheimen, Norway
  • Location: North 61:25.906, East 007:47.730 (GPS at the summit)
  • Saddle: "Bandet", the saddle SE of Storen (2405m), interpolated to 1730 meter.
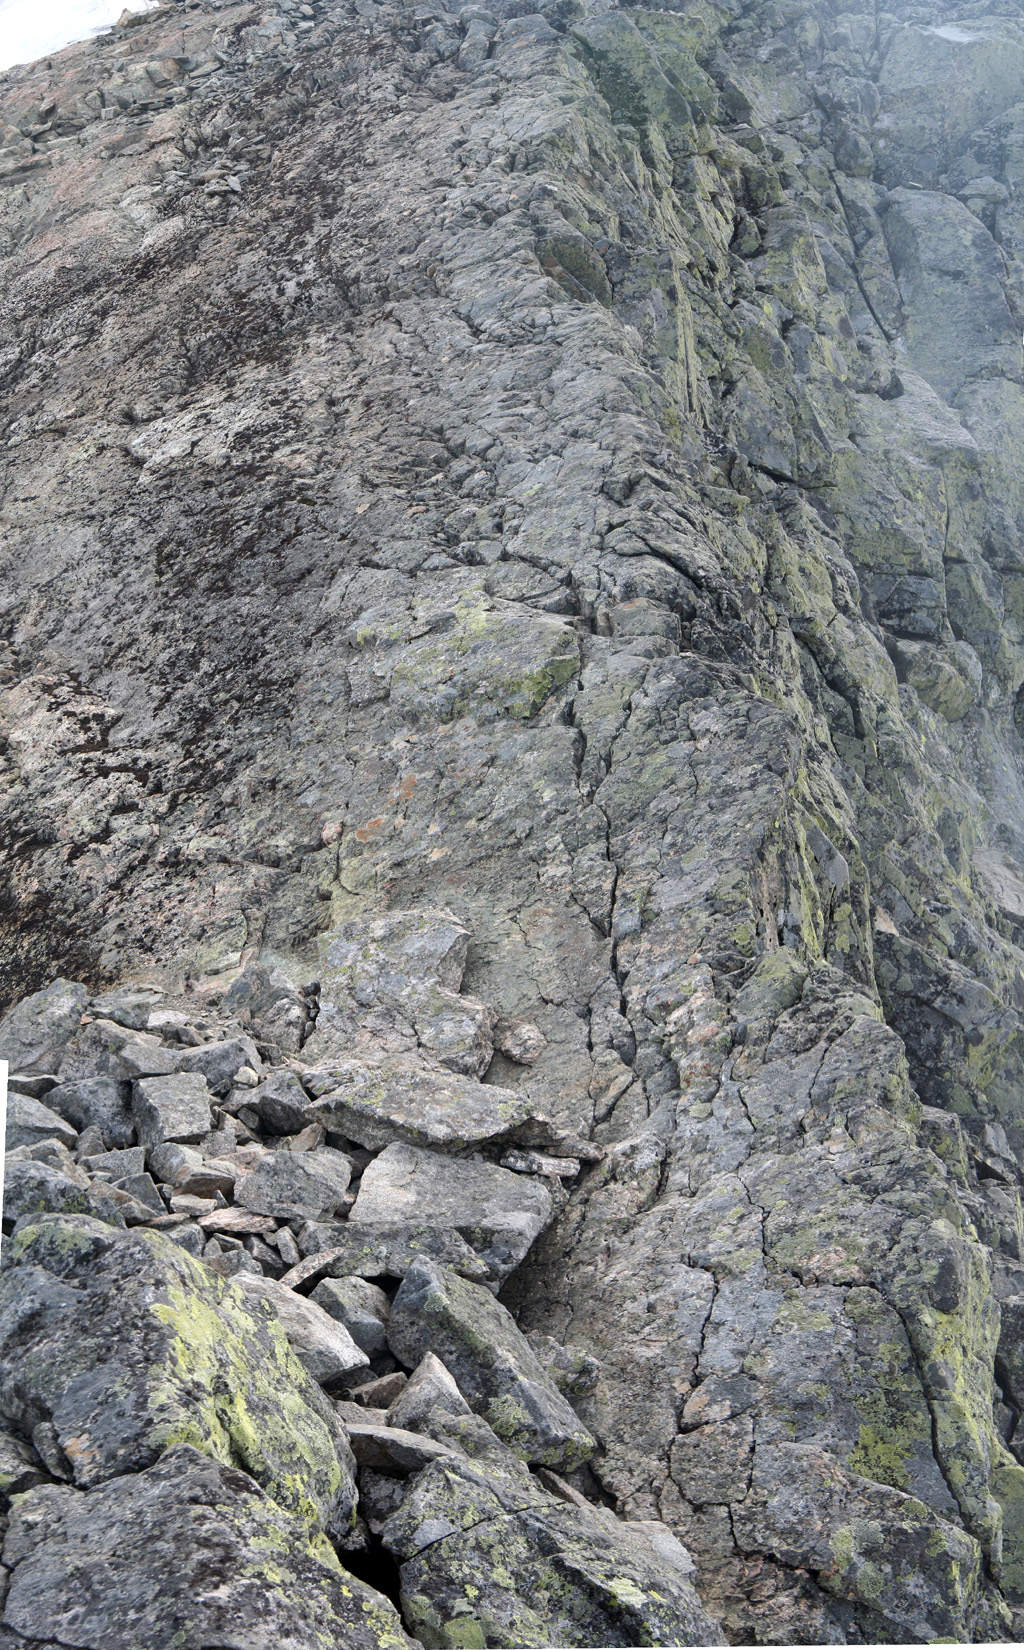
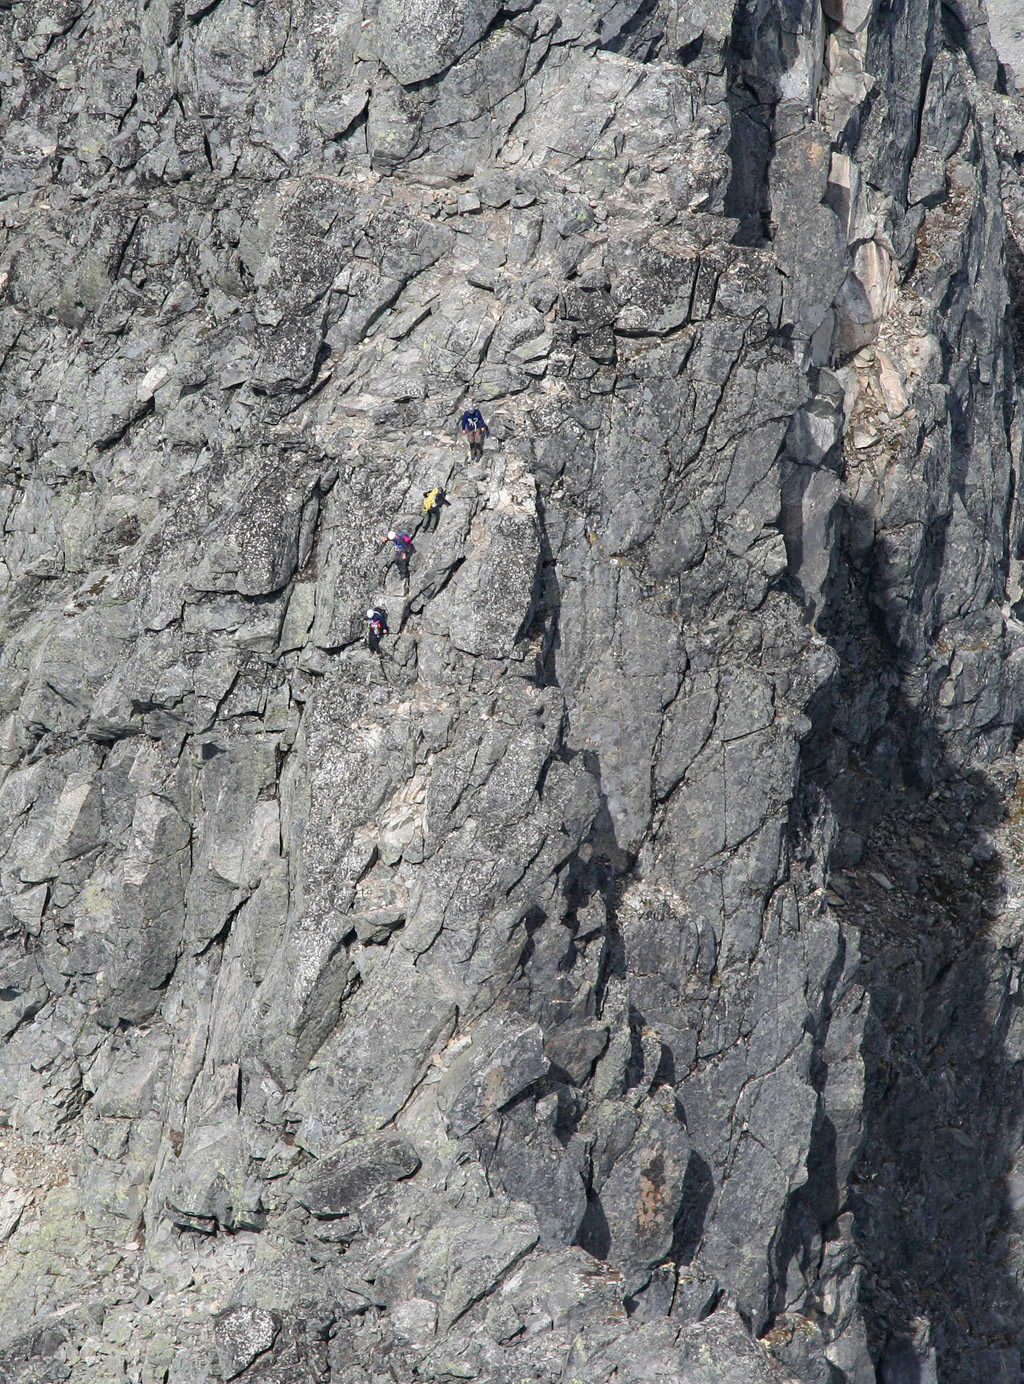
  • Difficulty: YDS class 4.
  • Climbed August 5, 2006.

Information:

How to get there: The best access is from a private road (only open in summer) that connects the mountain hotel Turtagrø, located at the west side of Hwy. 55, Sognefjellsveien, and the small community Øvre Årdal. Øvre Årdal is now well connected by roads leading to the lake Tyin with connection east (Oslo) along E-16, as well as to Lærdal and connections along E-16 west towards Bergen.
This is a toll road (NOK 50 in 2006), the toll being collected at the road's highest point, Berdalsbandet, 1320 meter. There are good turnouts and parking as well as campsites just on the north side of this saddle. I parked at location N61:26.224, E007:44.183, elevation 1288 meter.
Route description: From the road, head east, one can pass point 1483 on its south side or hike up the valley from the north side. Either way, continue east and ascend the gentle ridge that extends to the west of Austabottind. As you reach the ridge, a good view north across the Berdalsbreen glacier to Store Ringstind and, further left, to Soleibotntind (2083m) opens up. Continue east along the high ridge as it continues to climb and becomes somewhat more distinct. Higher up, you may keep a little to the right (south) in order to follow the easiest way. The ridge levels out as you pass a small cairn around 1930 meter, then climbs to a small, subsidiary point at 2020 meter, location N61:26.039, E007:47.015.
From here, the terrain is getting more interesting. The first feature is a deep gully that cuts in from the north. This gully has steep snow, but one may normally cross it at the very top. Alternatively, one can descend into the upper part of the gully that comes up from the south side. In the summer, there is no snow on this side. Proceed with easy terrain among bulders to the subsidiary west summit of Austabottind, elevation 2100, location N61:25.968, E007:47.340. To this point, the route (easiest way) is YDS class 2. From here, the route is YDS class 4 (mostly class 3, but with a couple of class 4 moves).
The route ahead looks considerably more difficult than it is, however, many parties will choose to rope up for the remainder of the route. Conditions can also change rapidly, the route may be more difficult in wet weather and definitely so if snow or ice remains on the route.
Start descending directly facing the saddle below. There are several variations in the upper part. The downclimb becomes somewhat steeper as you get lower down. You will soon see a chokestone partly blocking the access to the crack below it. The best way to proceed is to descend slightly left in order to arrive at the top of a very narrow, but well protected crack, continue down here and the descending climb has come to an end.
Traverse across the saddle and start the climb at the opposite end. The terrain is easy, but gets progressively steeper as you ascend. One may continue straight up along the top of the ridge, but the somewhat easier choice is to move off the ridge to your right, along and slightly down on a couple of ledges. There are several variations possible, an easy continuation is to follow a "highest possible" route up on a narrow ramp (very close to steep rock on your left), then down a similar ramp with a distinct crack, in order to arrive in easier terrain, a sort of broad gully with good rocks that will take you back up on the high ridge.
From this point, the crux of the route, at least in terms of psychology and consequences of a mishap, is a quite distinct ridge that runs uphill for 10-15 meter. The rock on the left is not very steep and there are several cracks and holds, but none are very large and the overall impression of this face is that it is "fairly smooth". The right side is somewhat steeper, but fortunately, there are several good hand and footholds near the top of the ridge. With good dry rock, the slope and friction on the left side of this ridge makes it possible to simply walk up, however, few people will do this without a secure belay, since any fall is obviously fatal. One may walk up on the left side while holding onto the top ridge, or alternatively, climb the ridge with one foot on either side and thus take advantage of the good steps that exist on the right hand side.
Above this ridge, the route moves onto more of a rock face, but the slope is not very steep and there are numerous good holds and steps. There is a patch of snow on your left (see pictures). Earlier in the season, or after snowy winters, this patch may be bigger and could block part of the route. If this is the case, then crampons, ice axe as well as a proper belay may be called for. However, I also talked to a climber that had done this section (including the crux ridge) in stable snow that provided good steps for mountain boots.
As you continue upwards, you will notice a shallow but distinct crack, a bit more than a meter wide, that heads up in the direction of the local summit above (the "third hump"). Follow this for a few meter, then exit left along a pretty obvious route with many good holds, in order to reach the main ridge just a couple of meter from the local saddle between the second and the third hump.
From this saddle, the remaining route follows the high ridge to the small plateau before the summit cairn. This ridge is somewhat narrow in a few places, one may possibly take a few steps just on its right side if walking on the very top becomes "too airy". The cairn itself has a spectacular position separating the summit plateau into two distinct areas. Two big blocks provide "a bridge" to the summit. Proceed on the right side of the first block, then climb onto the second block and touch the cairn. The cairn must be bypassed on the left side. Step up while holding on to the cairn and move around on the left. On the other side, there is a nice, flat section with room for several people as well as a couple of nice flat rocks that may serve as chairs. An excellent place for a well deserved break while enjoying the excellent views across Store Ringstind and over to Storen (Store Skagastølstind, 2405 meter).
The descent route follows the route of ascent. Just as the climb, the route back down and up to the West peak looks intimidating. One may, as a minimum, pay a visit to the "third hump" before descending. Also, the access to the South Summit, is supposed to be easier from this side, than from the south ridge. However, the south summit does require belayed climbing.
Trip Report/Comments: On Thursday, I had been in Stavanger celebrating my uncle's 85th. birthday. We drove back to Bergen early Friday afternoon, and I started out from Bergen at 1800. With a stop for food along the way, I arrived at the base of the mountain just before 2300. I pitched my tent and quickly fell asleep.
The next morning, I woke up around 0600, had breakfast and left the tent around 0700. I met a party of four (from Oslo), that intended to climb the South peak, then traverse to the main summit. We walked together for a while, then split as I headed more directly east to the west ridge. It was a quiet, nice morning and I quickly ascended the first part of the ridge. From here, there is a good view across to Store Ringstind as well as to the lake at the end of Berdalsbreen. Higher up, the view gets even prettier as more of Hurrungane comes into view. I pretty much followed the high ridge and got entangeled in some easy scrambling that I realized could have been avoided by staying somewhat more on the right hand side.
Already at 0930, I was on the west summit looking at the final section. Intimidating is a word that easily comes to mind. The remaining part of the route did not look easy. I proceeded down and found this downclimb easier than anticipated. The next section across the saddle and part way up the ridge was also easy. Without even looking at the option of going straight up the ridge, I followed narrow ledges out on the right side and around to the broad gully that climbed back onto the main ridge. This bypass stayed on good rock, no loose material or down sloping rock, quite enjoyable. It is quite honest to confess that the next 10-15 meter along the very distinct ridge looked somewhat dangerous. After resting for a few moments, I started up. Almost immediately, I realized that there were several good steps also on the right side of this ridge, this came as somewhat of a surprise, indeed a good blessing and I quickly completed the crossing up to nicer territory.
The terrain above this small ridge was definitely quite easy. The well known patch of snow was almost gone and my route did not even get close to it. As I ascended a pretty wide and easy crack, the route ahead looked quite obvious. Exit the crack and move up to the left. No problems whatsoever, before long I was standing in the saddle between the 2nd. and the 3rd. hump. From here, I followed the main ridge up across hump number two, then onwards to the summit. This ridge is certainly narrow and exposed in a few locations, but I never felt any problems with just walking along the very top.
I arrived at the summit at 1030, and could not resist a big grin when looking at the summit cairn. A most interesting location. No technical difficulties, but certainly exposed. I walked out on the big block and moved around the cairn, sending good thanks to whoever constructed this cairn with pretty solid and stable pieces of rock. It turned out, somewhat surprisingly, that there was a pretty big area on the far side of the cairn. Very nice to be here all by myself and know that I brought along a pretty nice lunch.
The weather was fine and I had not seen a single person. Almost not to believe on a close to perfect day in the beginning of August. I never tired from looking at the landscape so nicely laid out below and around me. Store Ringstind that I climbed on ski in March, Stølsmaradalstinden, Storen and the very impressive ridge extending across Styggedalstindene. After about 45 minutes I slowly and reluctantly started my descent. Nobody had yet appeared on the South summit. I climbed across the 2nd. hump and decided to pay a visit also to the 3rd. hump. Descending to the crux ridge went smoothly and there I met and talked to the first person of the day. Another solo climber that assured me that the south ridge of Uranostind certainly would be doable if I felt OK here. As I continued down to the saddle, I met a team of four, one instructor and three clients participating in a climbing course.
The climb back up on the west summit looked decidedly harder from this angle. However, by moving one secure step at a time, I was soon back on top of the West summit. Near the snow gully, I met the last climbers of the day, two young ladies that seemed well prepared. By now, I also spotted the team that I met in the morning on the top of the South Peak. Clearly, a much longer route than mine. Overall, surprisingly few people on a very well known mountain in what must have been one of the best days for doing this climb.
From here, I had a leisurely hike down along the west ridge. I decided to stay right and head directly for my tent. However, this course led me to the top of rather steep terrain and I needed to move left and scramble quite a bit before reaching the small valley floor and subsequently contouring back out to my tent.
Despite numerous stops for photography and general rests, I reached the tent well before 1600. A short rest, then packing. I drove down to Øvre Årdal making a stop along the way to view Store Austabottind from the south. After a good dinner in Årdal, I drove up to Tyin in order to camp and prepare for my second goal of the weekend, Uranostind near Tyin.

Resources: